EF Core AutoHistory Default AutoHistory
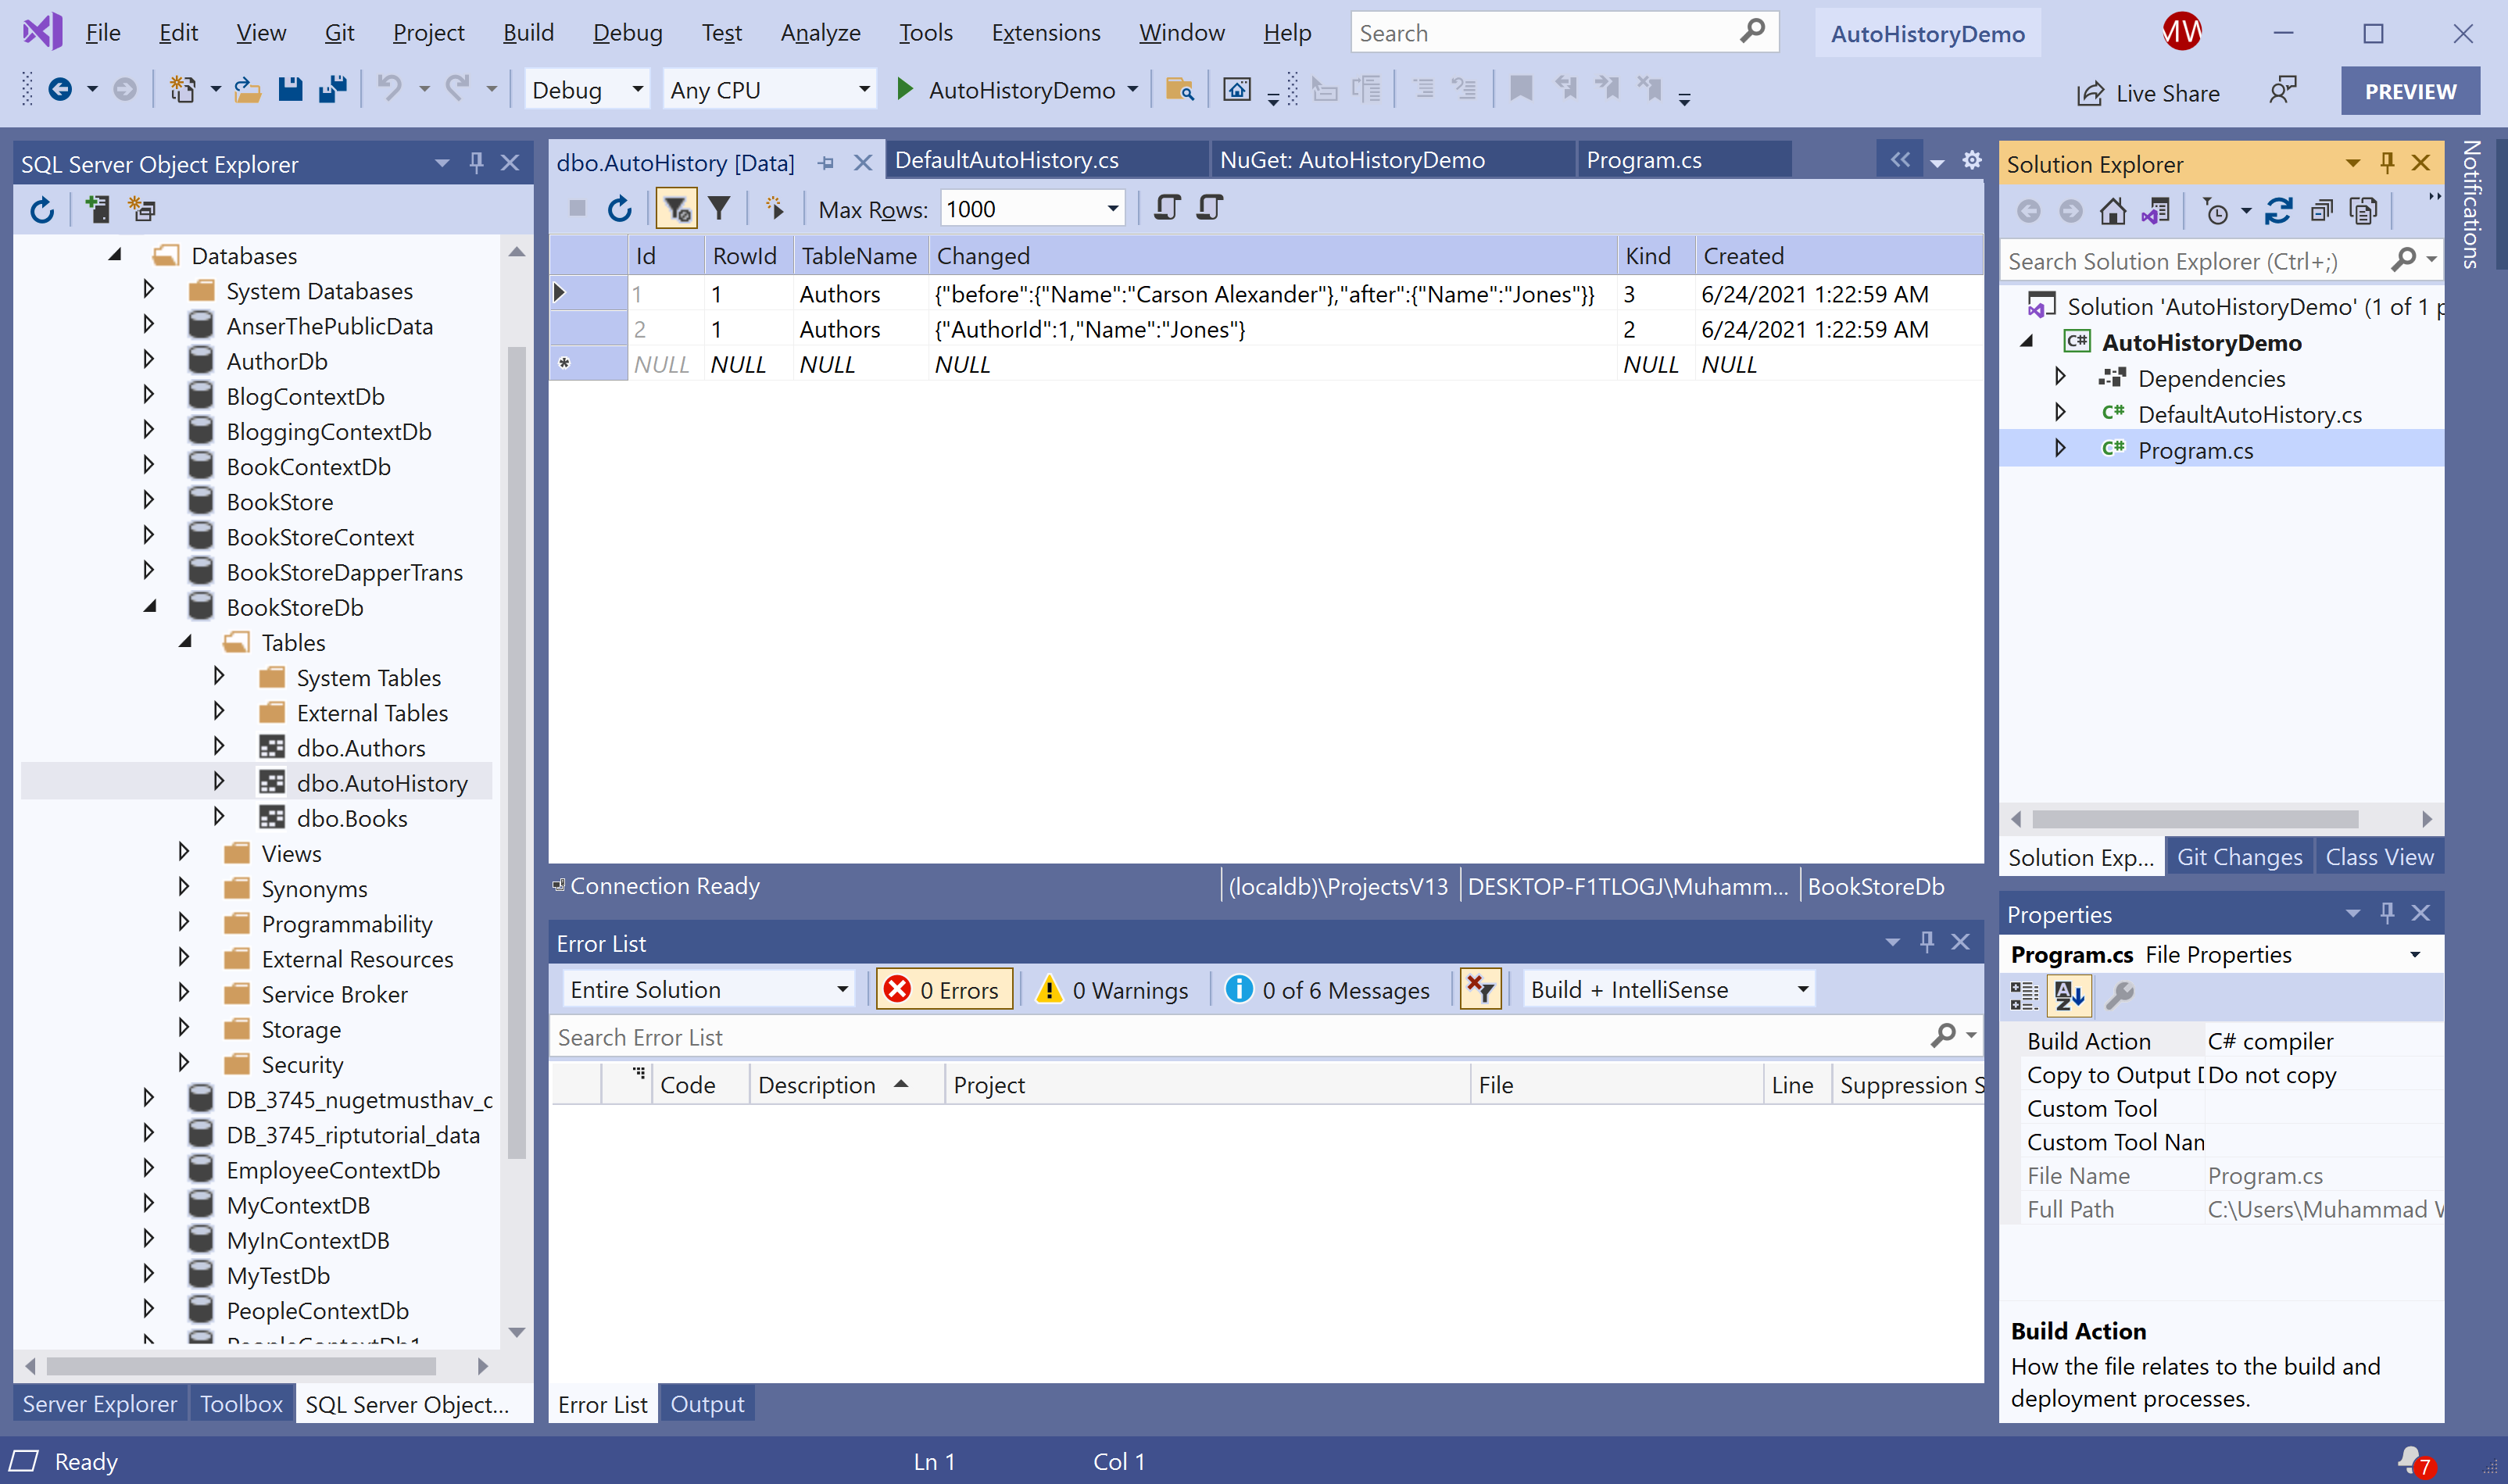
By default, AutoHistory records all the data changing history in one table named AutoHistories. To record all the data changes, you need to do the following steps.
Enable AutoHistory
The first step is to enable the auto history functionality by overriding the OnModelCreating function in the context class and call the EnableAutoHistory method.
public class BookStore : DbContext
{
    protected override void OnConfiguring(DbContextOptionsBuilder optionsBuilder)
    {
        optionsBuilder.UseSqlServer(@"Data Source=(localdb)\ProjectsV13;Initial Catalog=BookStoreDb;");
    }

    protected override void OnModelCreating(ModelBuilder modelBuilder)
    {
        // enable auto history functionality.
        modelBuilder.EnableAutoHistory(null);
    }

    public DbSet<Author> Authors { get; set; }
    public DbSet<Book> Books { get; set; }
}
Ensure AutoHistory
The second step is to make sure that you call the DbContext.EnsureAutoHistory() extension method before calling SaveChanges() or SaveChangesAsync().
The following example performs an update database operation.
public static void Example1()
{
    using (var context = new BookStore())
    {
        var author = context.Authors.FirstOrDefault();
        author.Name = "Jones";

        context.EnsureAutoHistory();
        context.SaveChanges();
    }
}
Let's consider another example that performs delete database operation.
public static void Example2()
{
    using (var context = new BookStore())
    {
        var author = context.Authors.FirstOrDefault();
        context.Authors.Remove(author);

        context.EnsureAutoHistory();
        context.SaveChanges();
    }
}
Let's run the above examples, and you will see that a table AutoHistories table is created in your databases with the following records.

