MVC Pattern Create MVC Application
In this chapter, we are going to talk about how you can create a new MVC web application. We will be doing it using Visual Studio. This way, we will understand how an MVC application is built and what are some of its components.
- We would need to set up the development environment.
- As an IDE, we are going to use Visual Studio 2019 (Community Edition) for creating our MVC application.
- As for the framework, it will be based on .NET 4.7.2. The proper version of Visual Studio can be found at https://visualstudio.microsoft.com/downloads/.
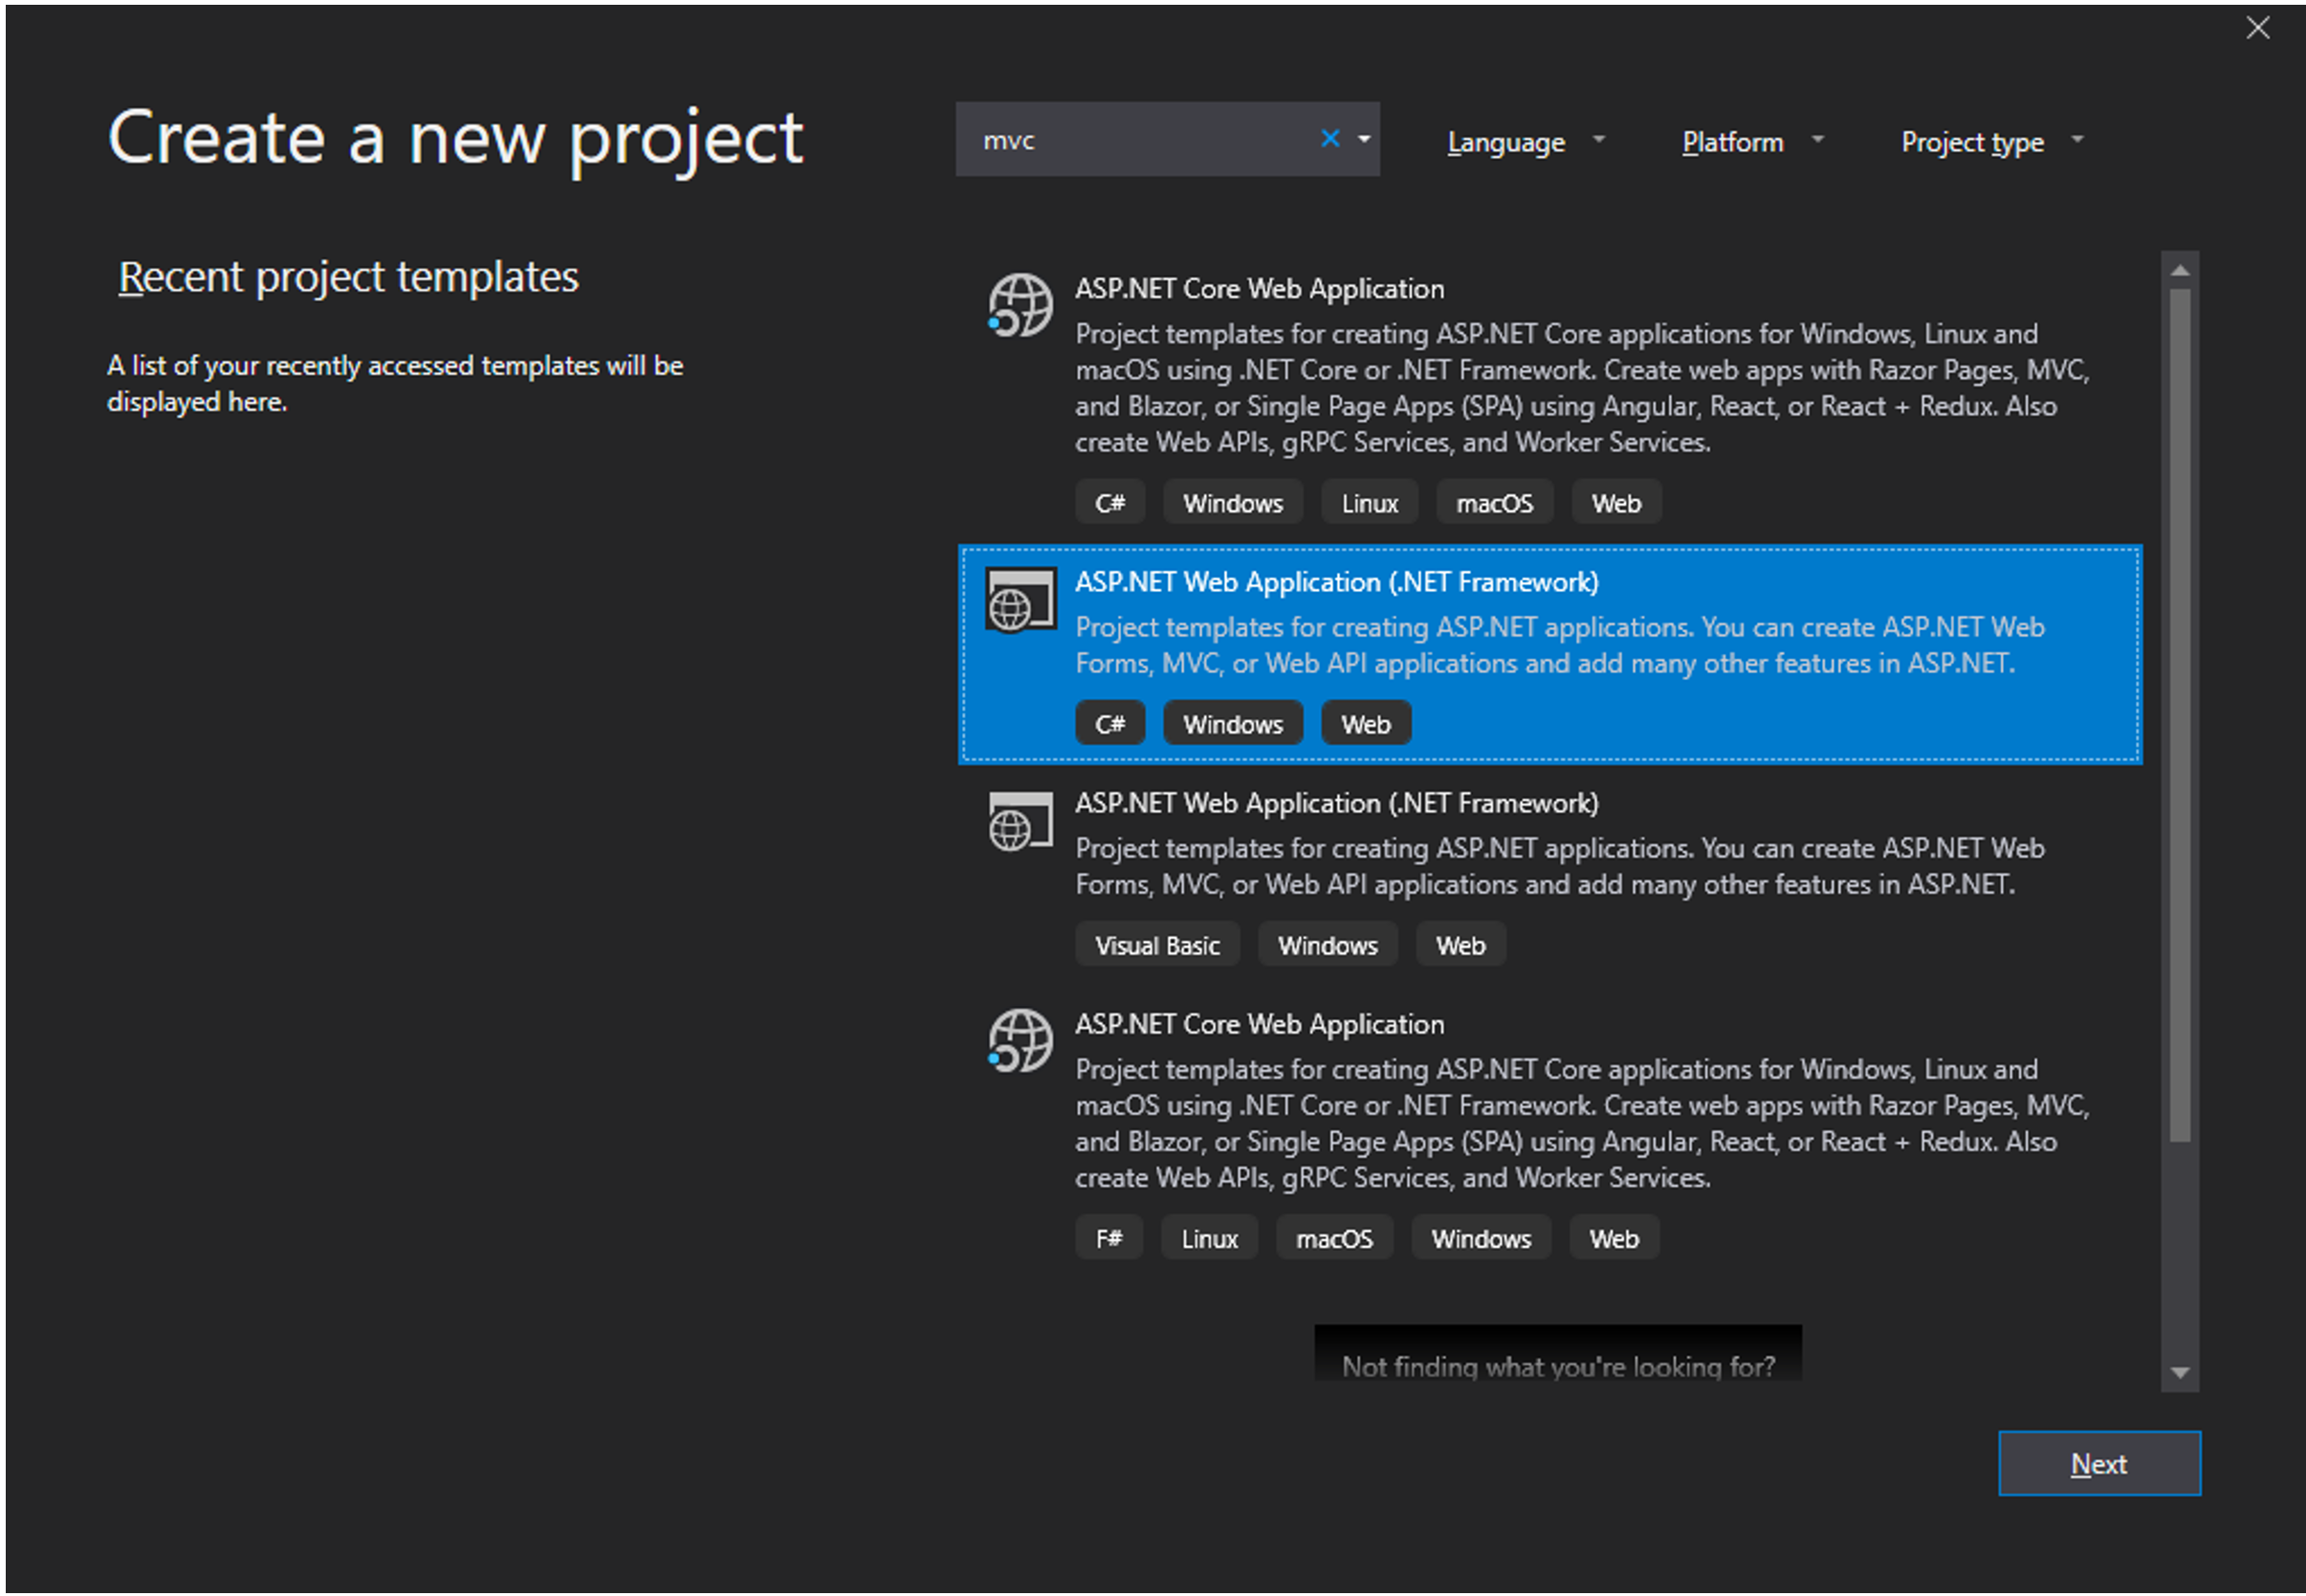
The next thing to do is create the Visual Studio 2019 project for our MVC application. With VS 2019 opened, go to File -> New -> Project and choose the ASP.NET Web Application (.NET Framework), shown below and click on Next.

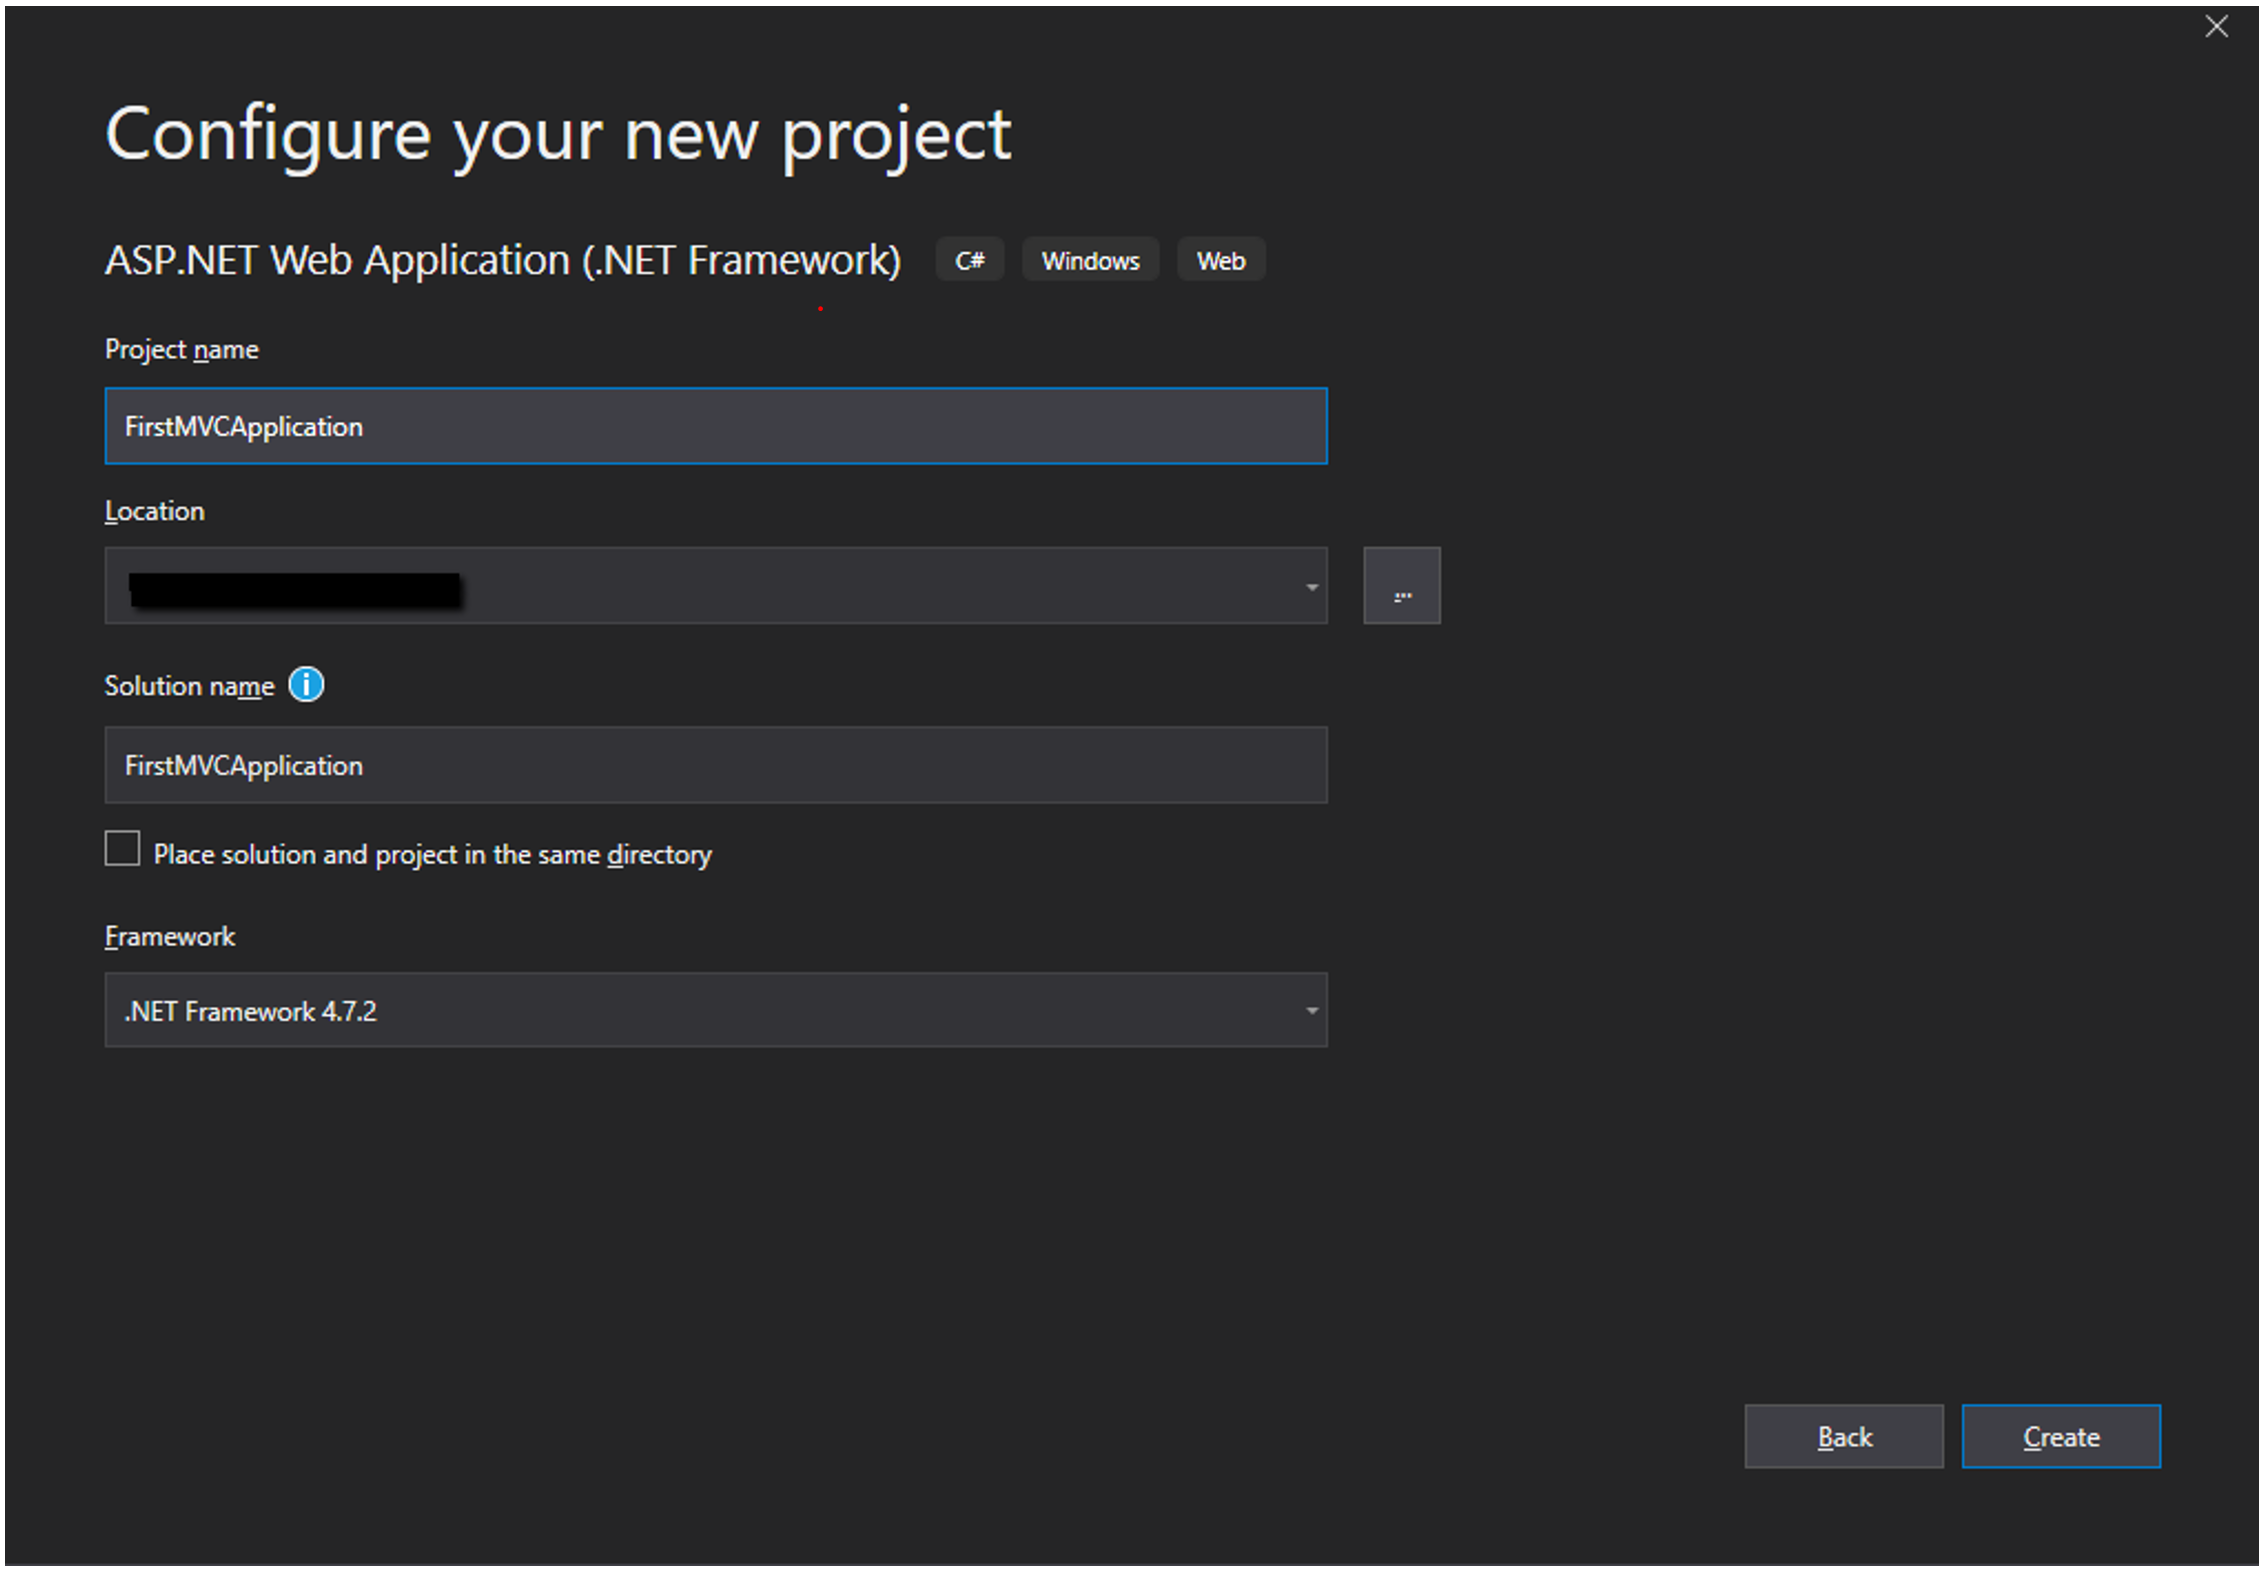
In the next screen, which is shown on the picture below:

- Define the name of your first MVC application by inputting FirstMVCApplication in the Project Name field.
- Define the location of your MVC project in the Location field.
- Define the name of your solution in the Solution name field.
- Define the .NET version framework in the Framework dropdown.
And click on the Create button.
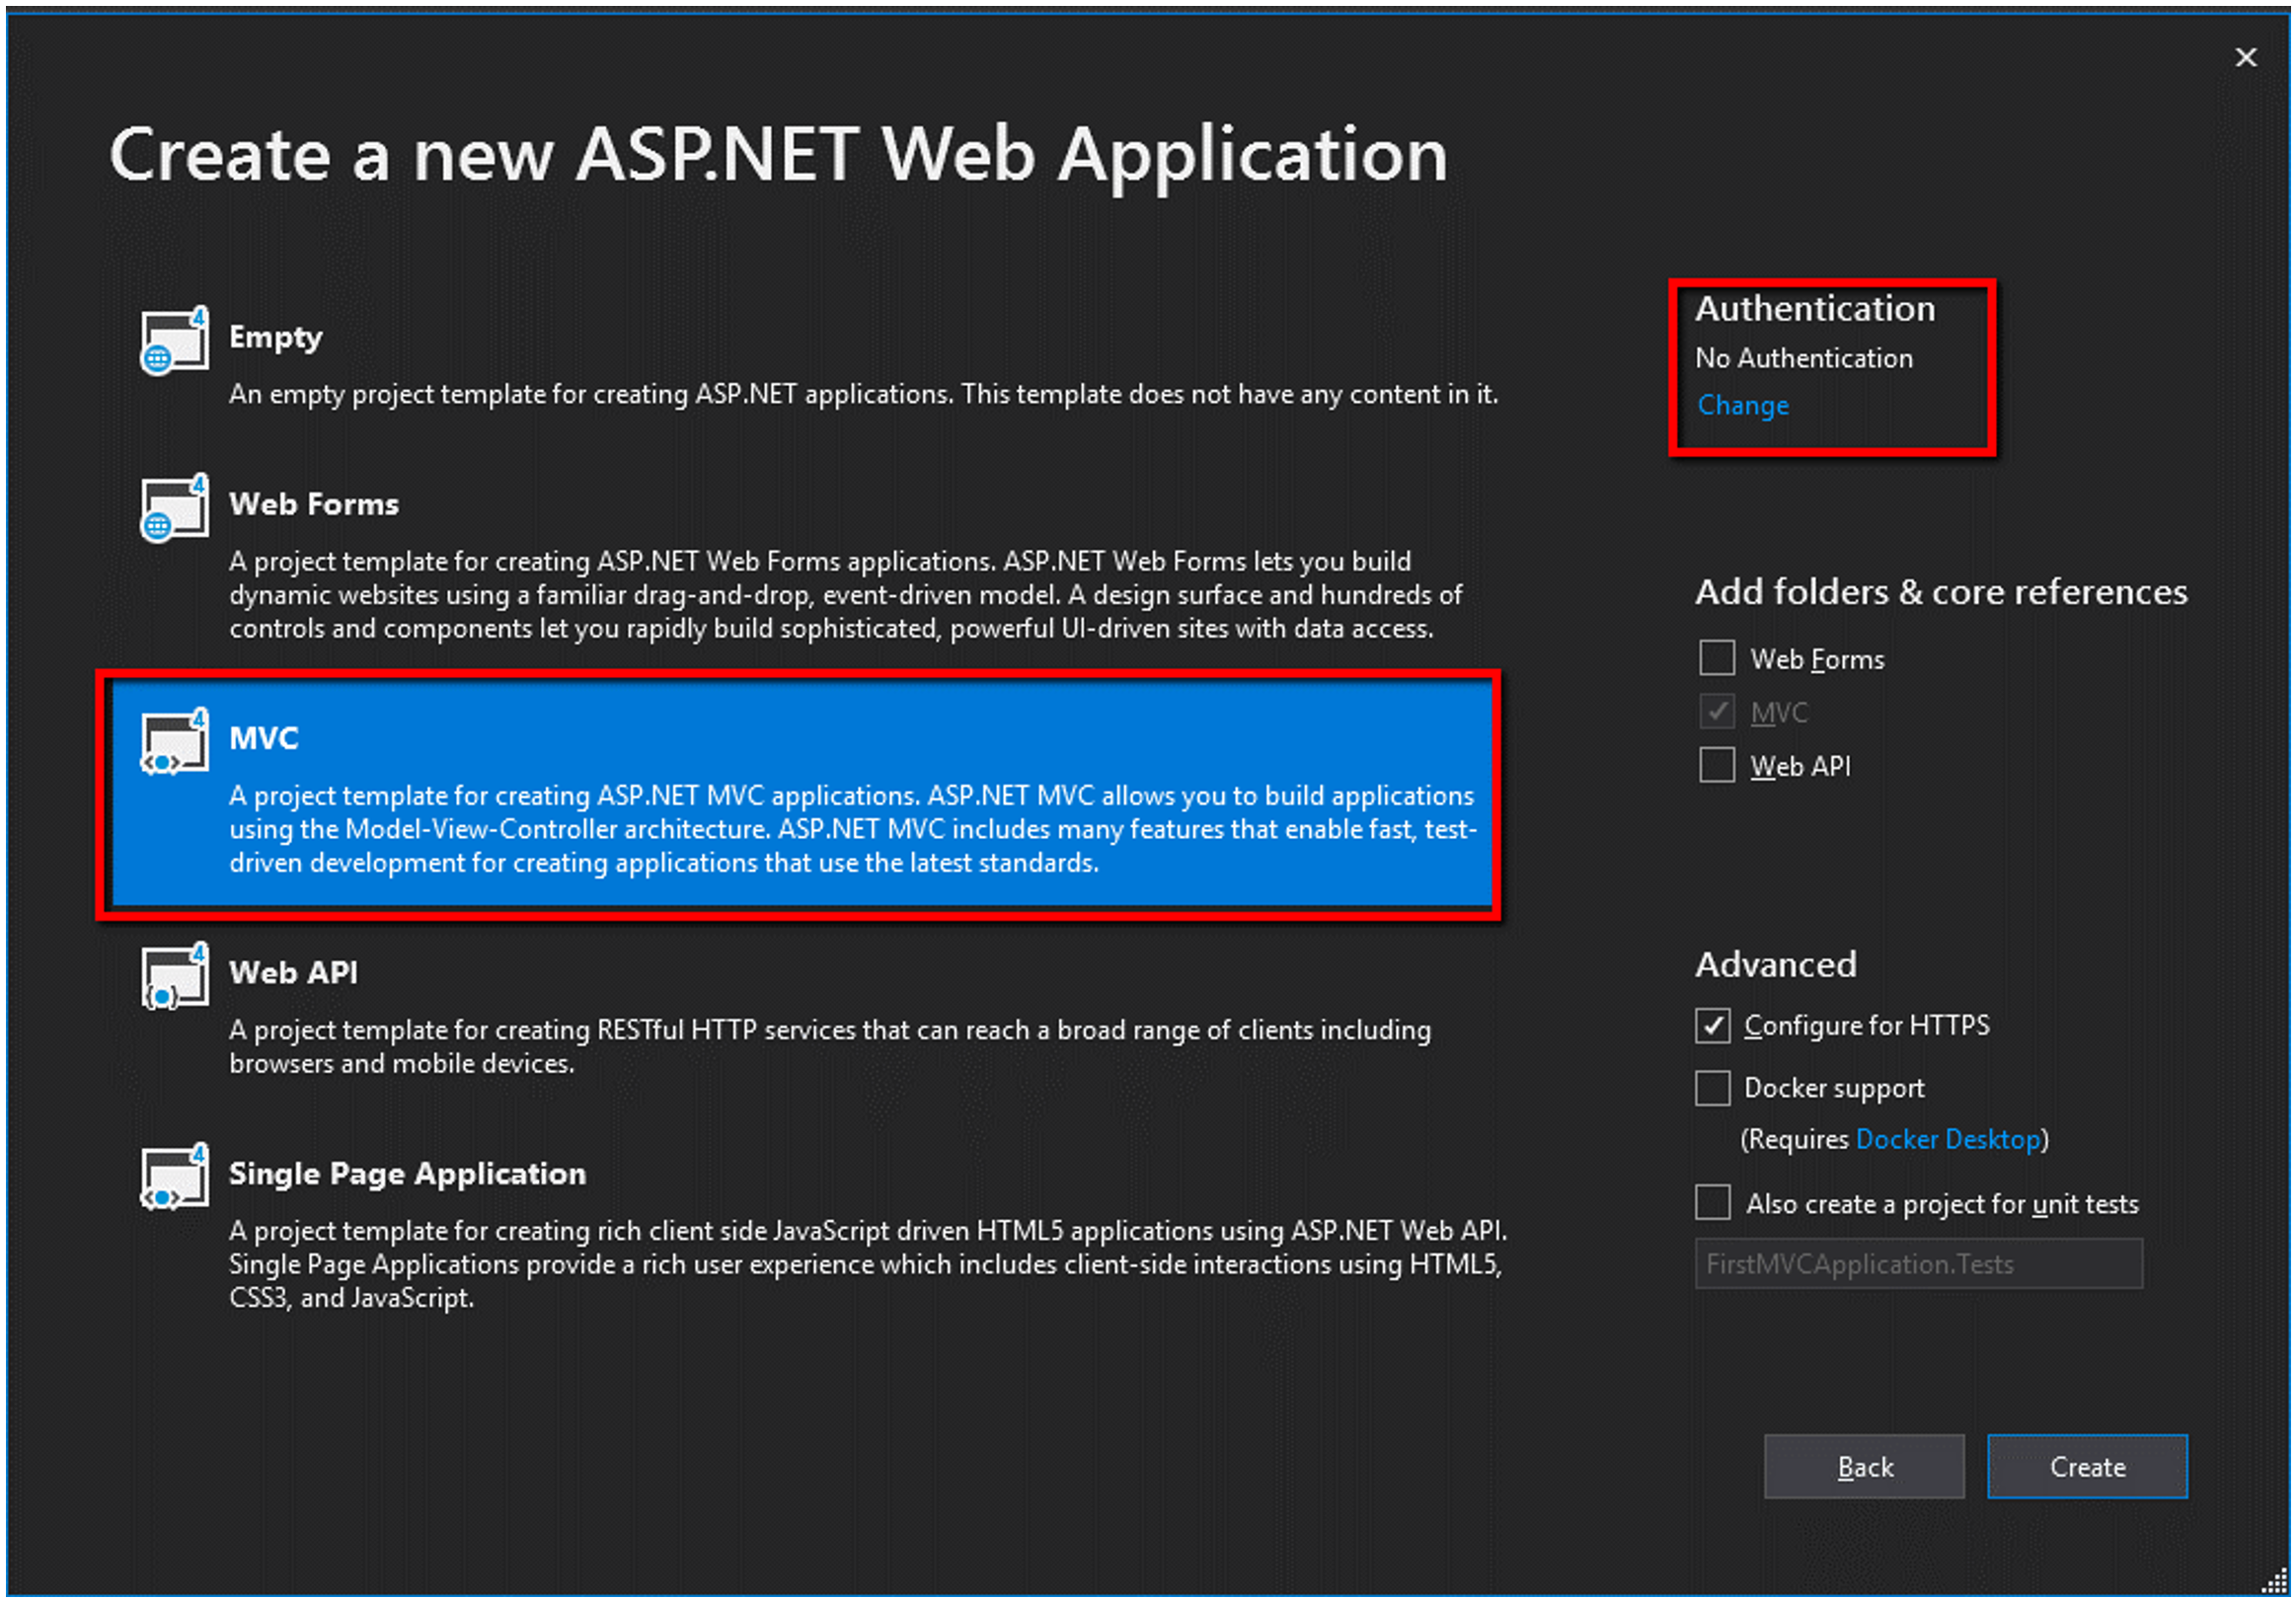
After that, we see the screen below, where we set up the application type by choosing MVC and the authentication type, which we will set at No Authentication. Everything else will be left as default.

Clicking on the Create button will confirm the creating of our first MVC application.
Next, we will learn about the folder structure of an MVC web application.
