NuGet NuGet Server
Microsoft provides NuGet.Server package that can host a package feed on any server that runs IIS using ASP.NET application.
- NuGet.Server makes a folder on the server available through HTTP(S) specifically OData.
- It is easy to set up and is best for simple scenarios.
Create ASP.NET Application
The first step is to create an empty ASP.NET Web application in Visual Studio.
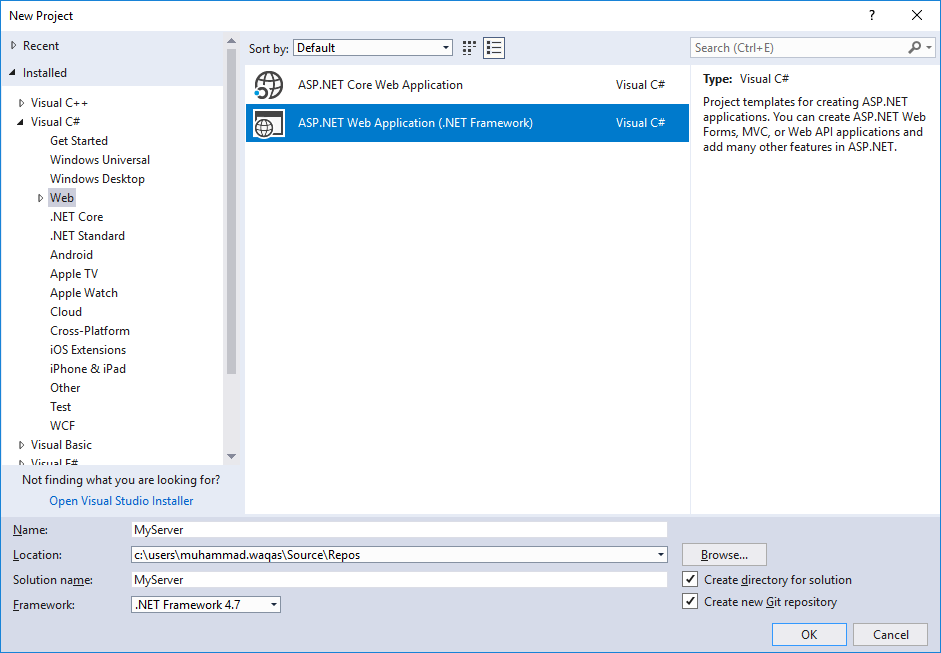
Select the ASP.NET Web Application (.NET Framework) and enter the name for your server in the Name field and then select OK.
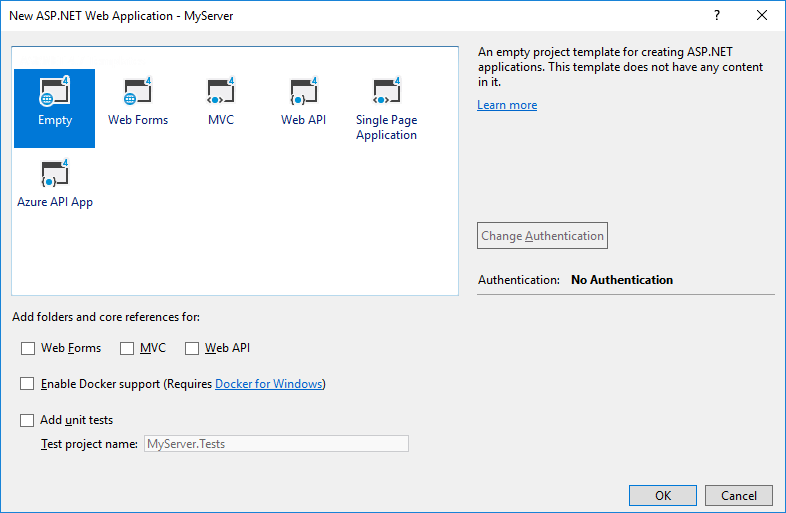
Select the Empty template, then click OK. Now add the NuGet.Server package to your project using NuGet Package Manager.
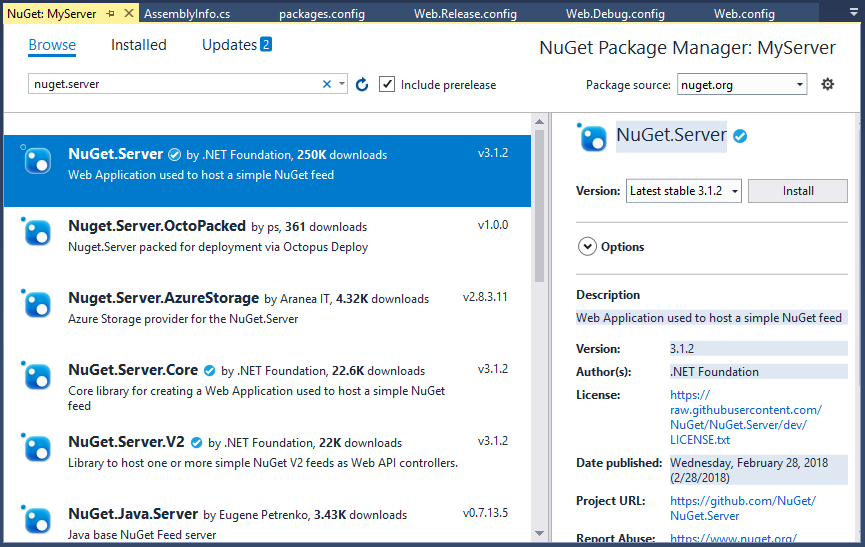
It converts the empty Web application into a package source.
- It installs a variety of other packages, creates a Packages folder in the application, and modifies web.config to include additional settings.
- You can change the packages folder in web.config file by specifying the value of
packagesPath.
Open your Web.config and set the value of packagesPath to D:\MyPackages.
<!-- Change the path to the packages folder. The default is ~/Packages.
It can be a virtual or physical path. -->

<add key="packagesPath" value="D:\MyPackages" />
Run your application, and you will have a NuGet Server.
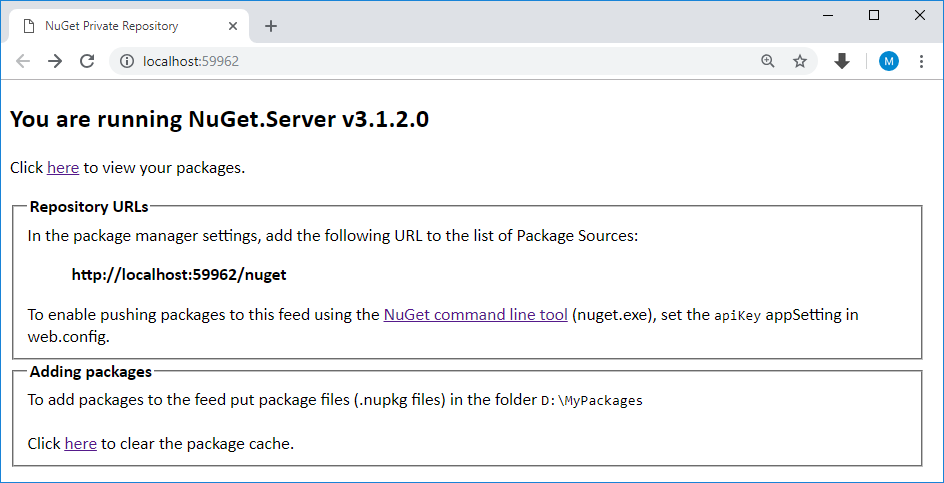
- The home page provides the package feed URLs.
- If you see errors, carefully inspect your
web.configfor duplicate elements. - Click on
heresee the OData feed of packages.
Add Packages to the Feed
Once a NuGet.Server site is running; you can add packages using nuget push provided that you set an API key value in web.config.
- After installing the
NuGet.Serverpackage,web.configcontains an emptyappSetting/apiKeyvalue. - When
apiKeyis blank, pushing packages to the feed is disabled.
<!-- Set the value here to allow people to push/delete packages from the server.
    NOTE: This is a shared key (password) for all users. -->

<add key="apiKey" value="" />
To enable this capability, set the apiKey to a value (strong password) and add a key called appSettings/requireApiKey with the value of true.
<!-- Determines if an Api Key is required to push\delete packages from the server. -->
<add key="requireApiKey" value="true" />

<!-- Set the value here to allow people to push/delete packages from the server.
    NOTE: This is a shared key (password) for all users. -->
<add key="apiKey" value="" />
If your server is already secured or you do not require an API key, you can set requireApiKey to false. All users with access to the server can then push packages.
Removing Packages from the Feed
You can remove a package using nuget delete command from the repository provided that you include the API key with the comment.
If you want to change the behavior to delist the package instead and leaving it available for package restore, change the enableDelisting key in web.config to true.
<!-- Set enableDelisting to true to enable delist instead of delete as a result of a "nuget delete" command.
    - delete: package is deleted from the repository's local filesystem.
    - delist:
      - "nuget delete": the "hidden" file attribute of the corresponding nupkg on the repository local filesystem is turned on instead of deleting the file.
      - "nuget list" skips delisted packages, i.e. those that have the hidden attribute set on their nupkg.
      - "nuget install packageid -version version" command will succeed for both listed and delisted packages.
        e.g. delisted packages can still be downloaded by clients that explicitly specify their version. -->

<add key="enableDelisting" value="true" />