EF Core with MVC Create Controller and Views
MVC controllers are responsible for responding to requests made against your website. Each browser request is mapped to a particular controller.
For example, you entered the following URL into the address bar of your browser.
http://localhost/Author/Index/
In this case, a controller named AuthorController is invoked. The AuthorController is responsible for generating the response to the browser request.
- The controller decides which model will be selected, and then it takes the data from the model and passes the same to the respective view after that view is rendered.
- Actually, controllers are controlling the overall flow of the application taking the input and rendering the proper output.
To create a controller, right-click the Controllers folder in Solution Explorer, and select Add > New Scaffolded Item...
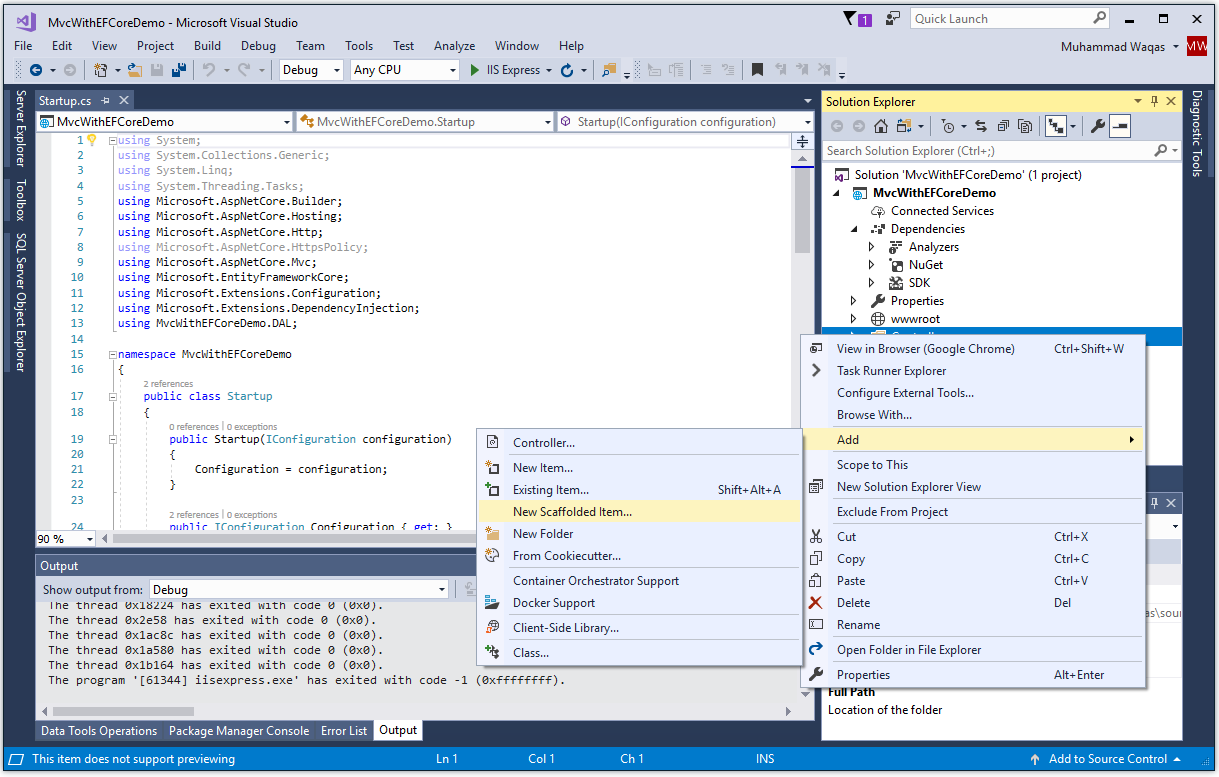
It will open the Add Scaffold dialog box.
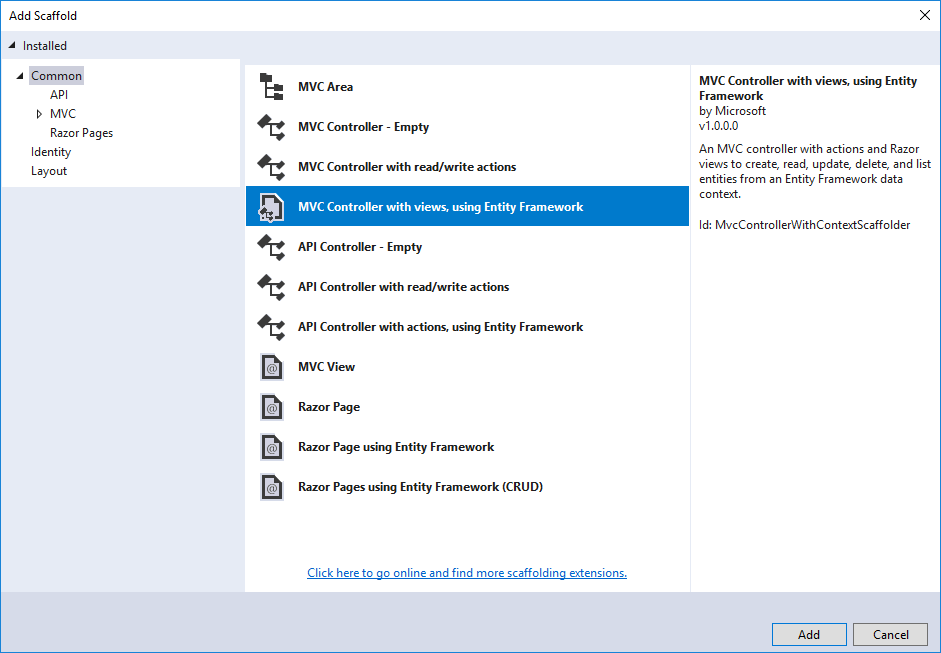
Select MVC controller with views, using Entity Framework, and then click Add button.
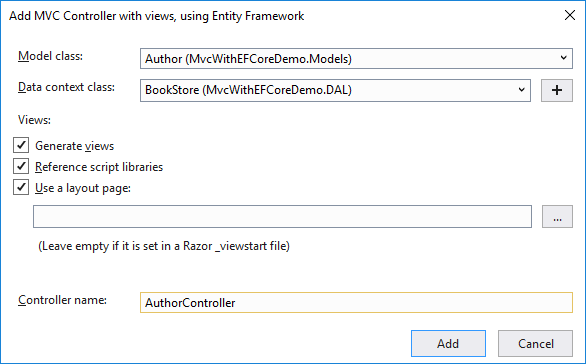
In the Add MVC Controller with views, using Entity Framework dialog box, select Author (MvcWithEFCoreDemo.Models) from the Model class and BookStore (MvcWithEFCoreDemo.DAL) from the Data context class dropdown.
Enter AuthorController (not AuthorsController) as a Controller name and click Add button. The scaffolder creates an AuthorController.cs file and a set of views (.cshtml files) that work with the controller.
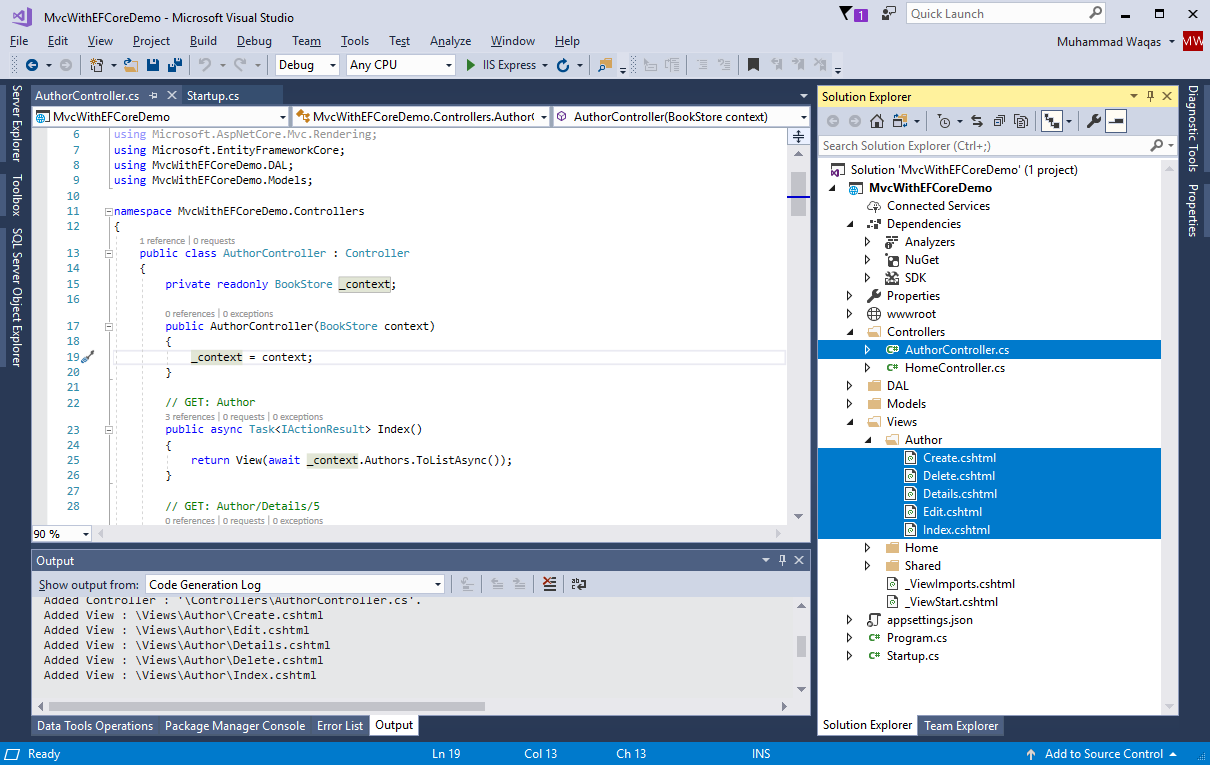
In the AuthorController.cs file, you will see that the controller takes a BookStore as a constructor parameter.
private readonly BookStore _context;

public AuthorController(BookStore context)
{
    _context = context;
}
ASP.NET Core dependency injection takes care of passing an instance of BookStore into the controller. We have configured that in the Startup.cs file earlier.
services.AddDbContext<BookStore>(options => options.UseSqlServer(Configuration.GetConnectionString("DefaultConnection")));
The Index action method gets a list of authors from the Authors table.
// GET: Author
public async Task<IActionResult> Index()
{
    return View(await _context.Authors.ToListAsync());
}
Now if you open Views/Author/Index.cshtml file, you will see that the view displays the list of authors in a table.
@model IEnumerable<MvcWithEFCoreDemo.Models.Author>

@{
    ViewData["Title"] = "Index";
}

<h1>Index</h1>

<p>
    <a asp-action="Create">Create New</a>
</p>
<table class="table">
    <thead>
        <tr>
            <th>
                @Html.DisplayNameFor(model => model.FirstName)
            </th>
            <th>
                @Html.DisplayNameFor(model => model.LastName)
            </th>
            <th>
                @Html.DisplayNameFor(model => model.BirthDate)
            </th>
            <th></th>
        </tr>
    </thead>
    <tbody>
@foreach (var item in Model) {
        <tr>
            <td>
                @Html.DisplayFor(modelItem => item.FirstName)
            </td>
            <td>
                @Html.DisplayFor(modelItem => item.LastName)
            </td>
            <td>
                @Html.DisplayFor(modelItem => item.BirthDate)
            </td>
            <td>
                <a asp-action="Edit" asp-route-id="@item.AuthorId">Edit</a> |
                <a asp-action="Details" asp-route-id="@item.AuthorId">Details</a> |
                <a asp-action="Delete" asp-route-id="@item.AuthorId">Delete</a>
            </td>
        </tr>
}
    </tbody>
</table>
Setup Menu Options
Open Views\Shared_Layout.cshtml, and add menu entries for Authors, and Books (controller and views will be added later) as shown below.
<header>
    <nav class="navbar navbar-expand-sm navbar-toggleable-sm navbar-light bg-white border-bottom box-shadow mb-3">
        <div class="container">
            <a class="navbar-brand" asp-area="" asp-controller="Home" asp-action="Index">MvcWithEFCoreDemo</a>
            <button class="navbar-toggler" type="button" data-toggle="collapse" data-target=".navbar-collapse" aria-controls="navbarSupportedContent"
                    aria-expanded="false" aria-label="Toggle navigation">
                <span class="navbar-toggler-icon"></span>
            </button>
            <div class="navbar-collapse collapse d-sm-inline-flex flex-sm-row-reverse">
                <ul class="navbar-nav flex-grow-1">
                    <li class="nav-item">
                        <a class="nav-link text-dark" asp-area="" asp-controller="Home" asp-action="Index">Home</a>
                    </li>
                    <li class="nav-item">
                        <a class="nav-link text-dark" asp-area="" asp-controller="Author" asp-action="Index">Authors</a>
                    </li>
                    <li class="nav-item">
                        <a class="nav-link text-dark" asp-area="" asp-controller="Book" asp-action="Index">Books</a>
                    </li>
                    <li class="nav-item">
                        <a class="nav-link text-dark" asp-area="" asp-controller="Home" asp-action="Privacy">Privacy</a>
                    </li>
                </ul>
            </div>
        </div>
    </nav>
</header>
Change each occurrence of "MvcWithEFCoreDemo" to "Book Store".
Press Ctrl+F5 to run the project, click the Authors tab to see the test data.
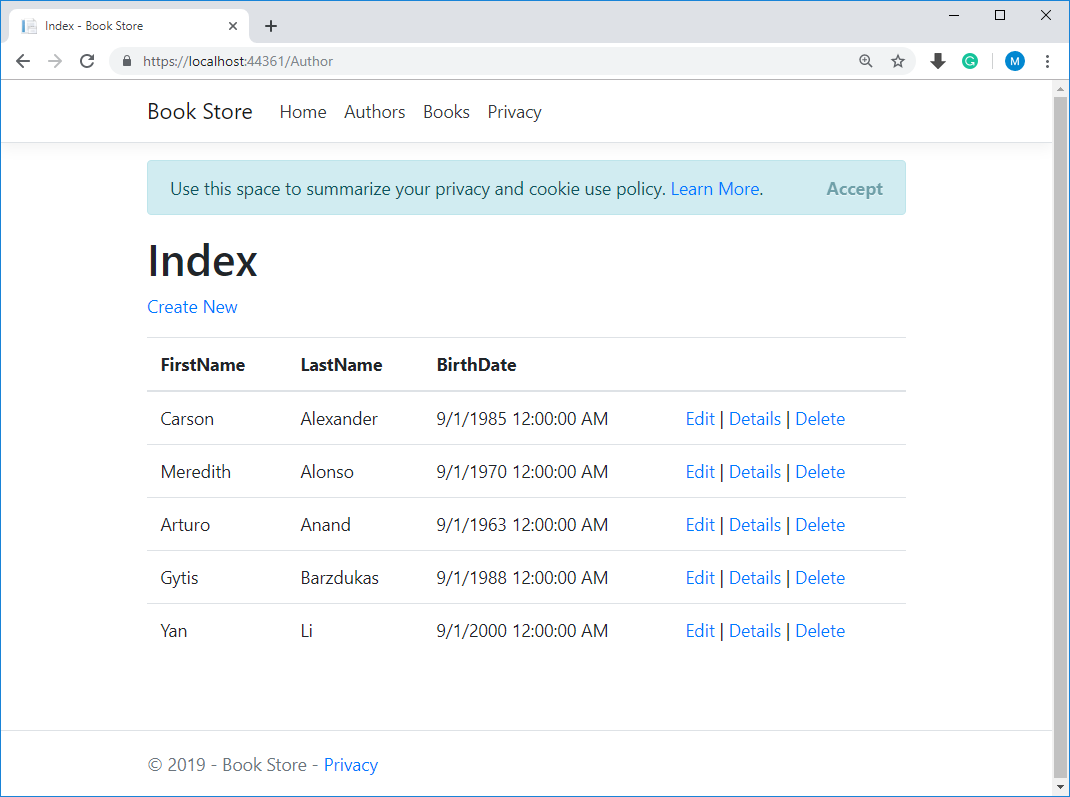
View Database
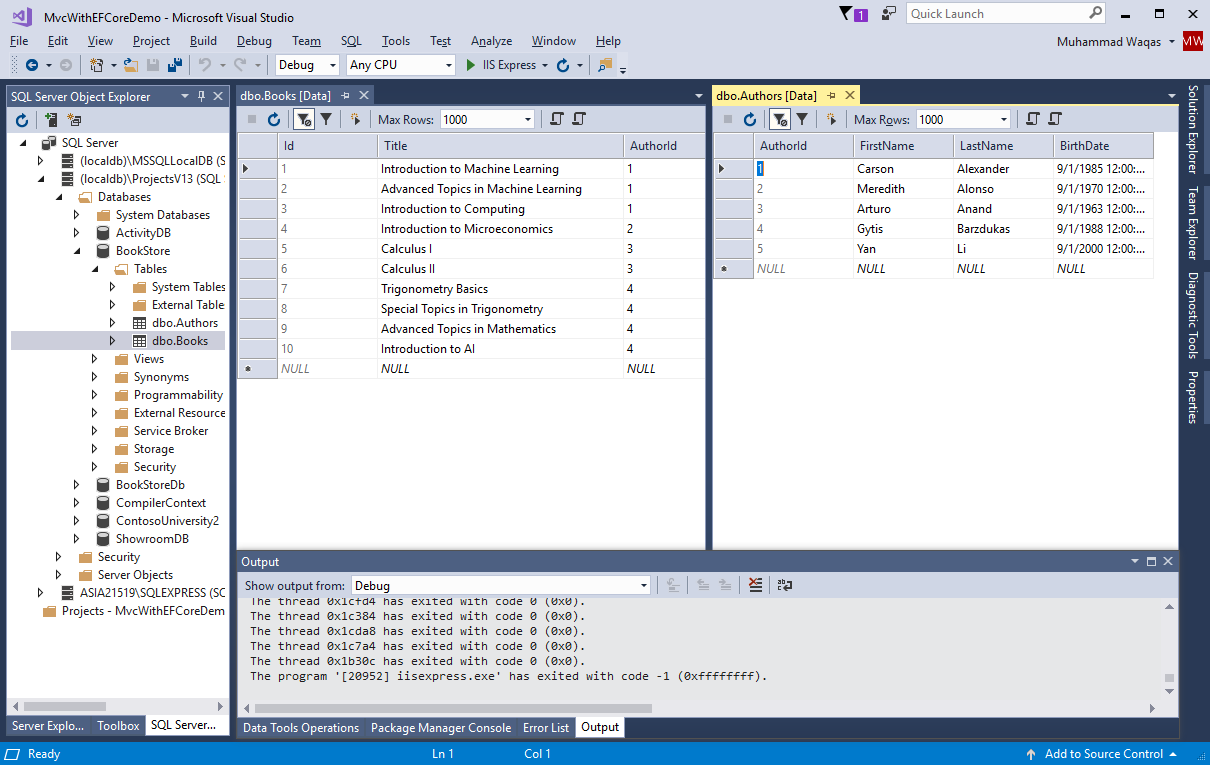
You can use SQL Server Object Explorer to view the database in Visual Studio, by right-clicking on the Authors table and click View Data to see the rows that were inserted into the table.
