Dapper + MVC Basic CRUD Functionality
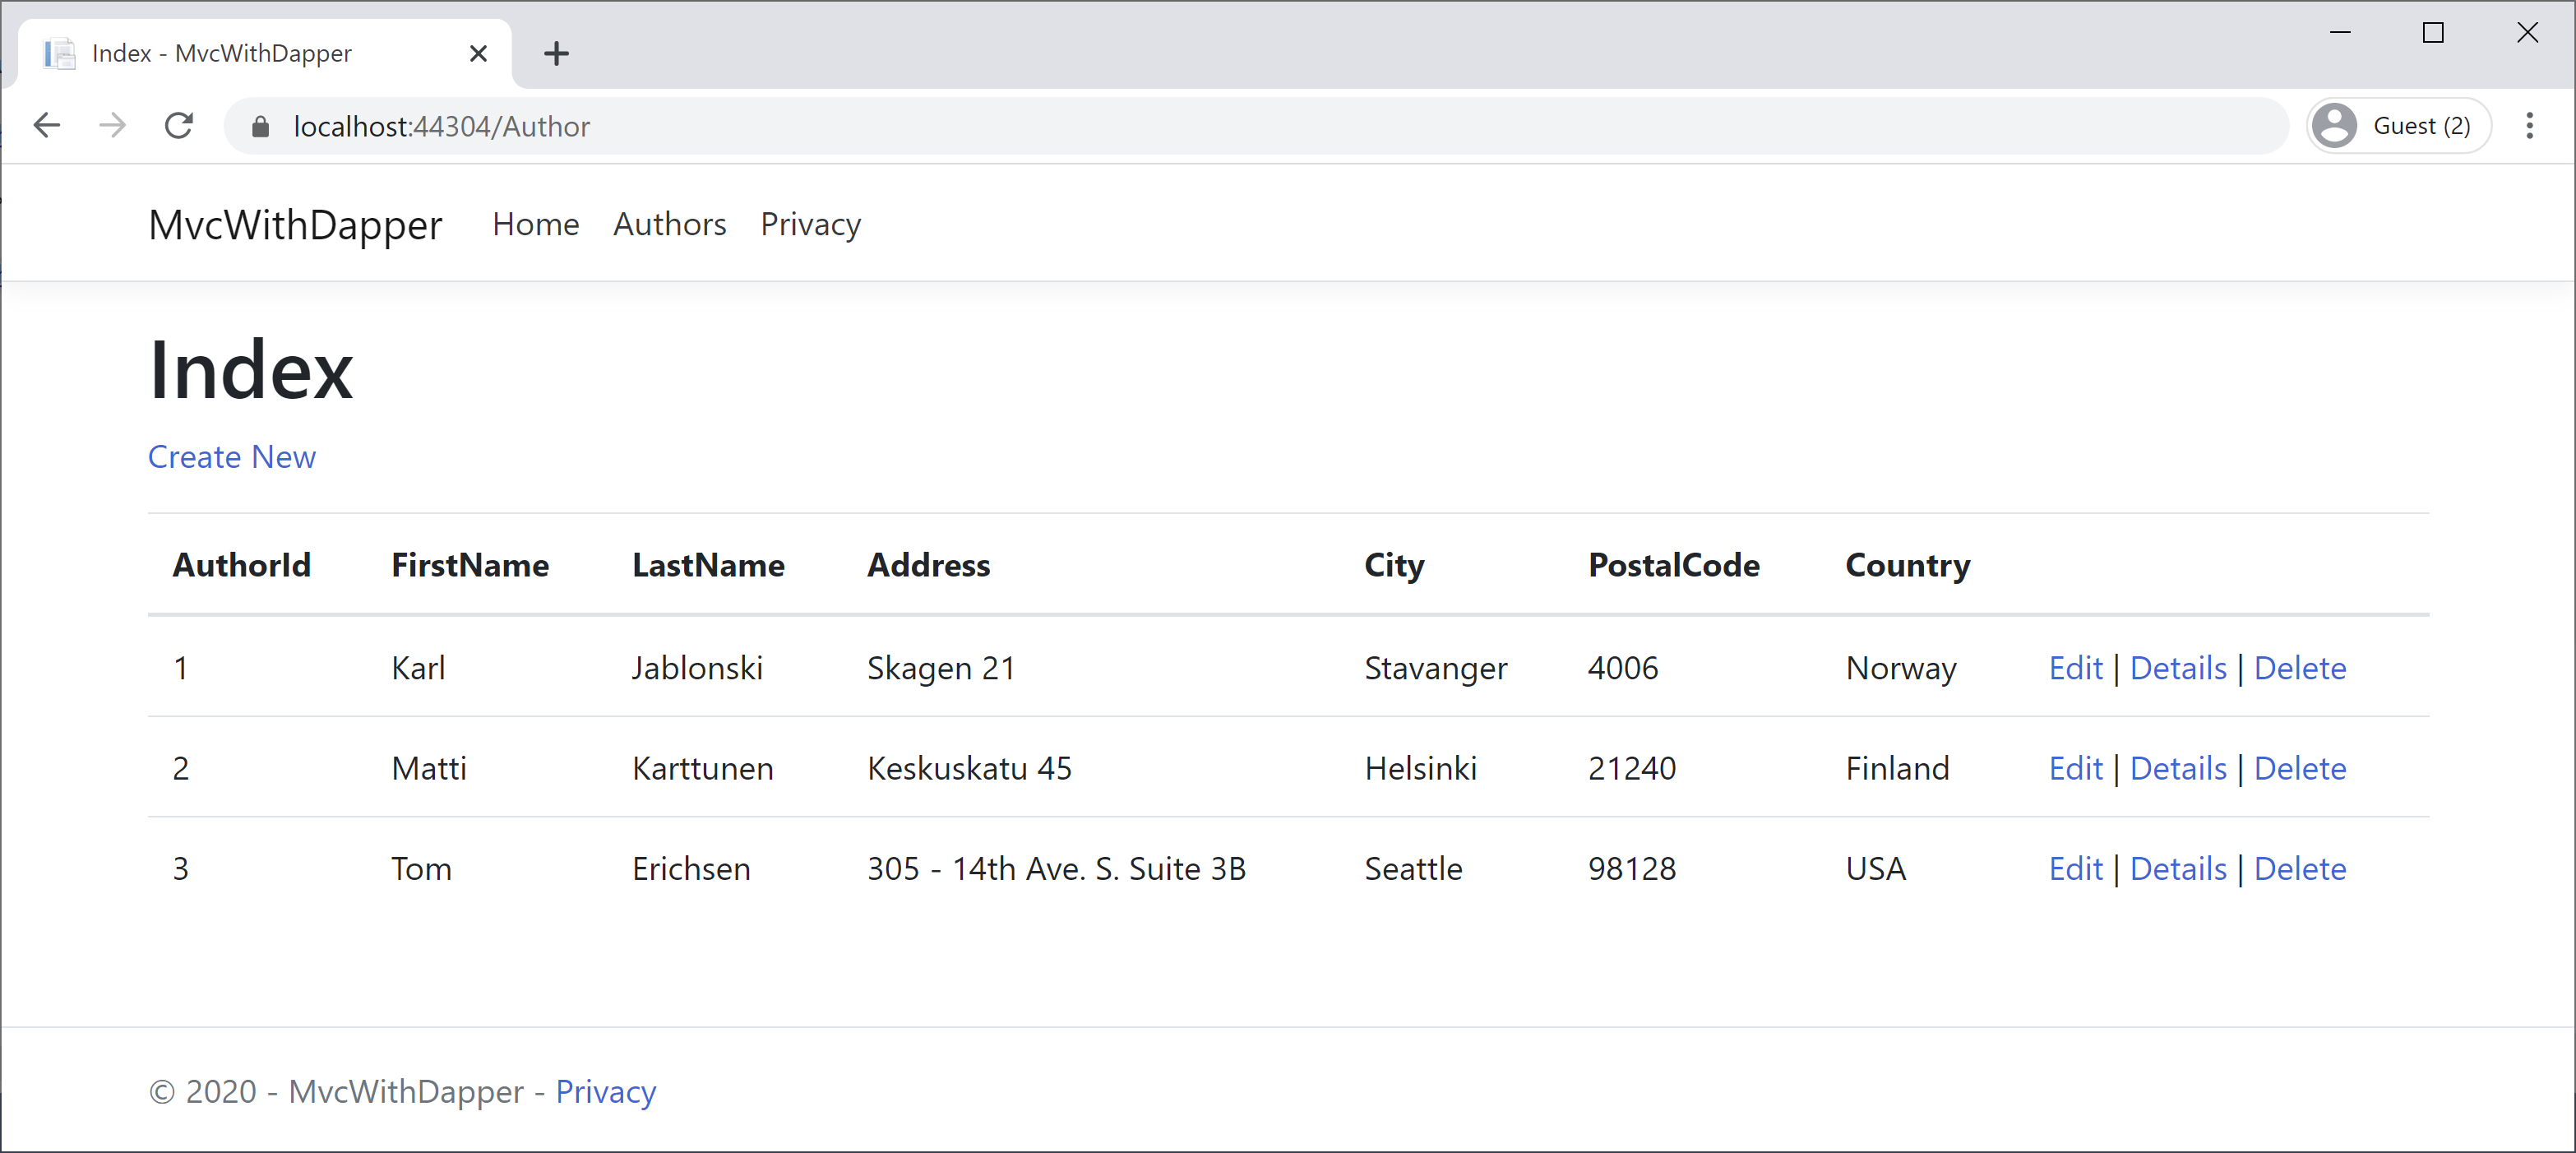
In this article, we will learn about CRUD (Create, Read, Update, Delete) functionality in ASP.NET MVC using Dapper. Let's run your application.
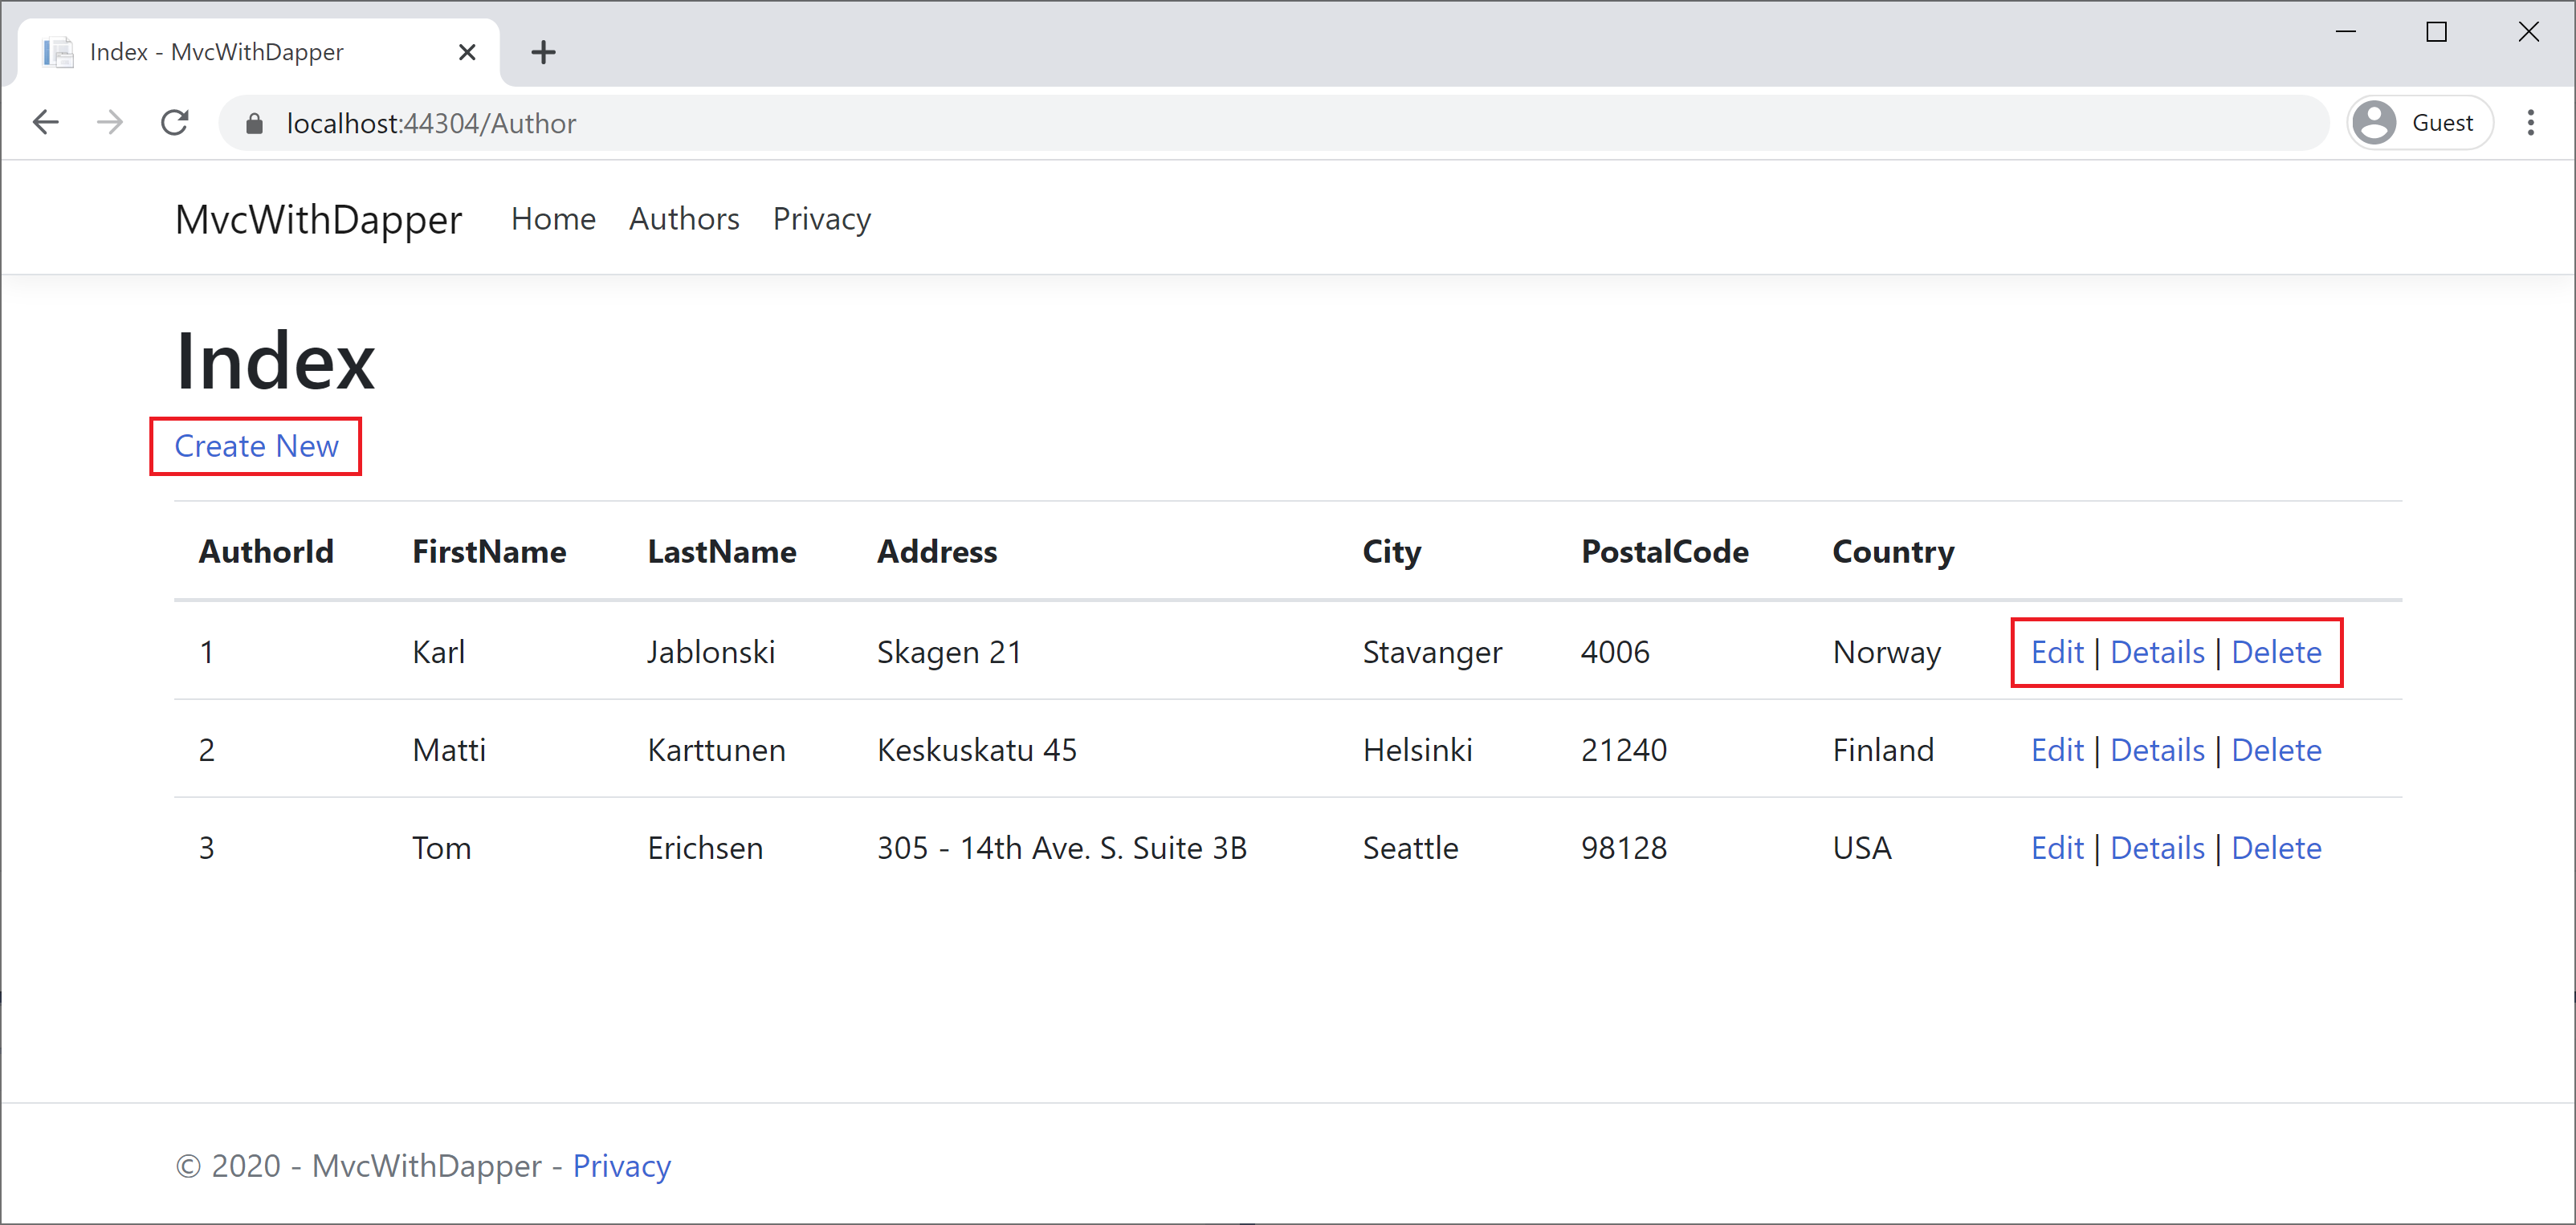
You can create a new author, delete or edit an existing author, and you can also see the details of any particular author using the highlighted links. But the views associated with these links are not available, and we need to add these views and update their respective actions in AuthorController.
Details View
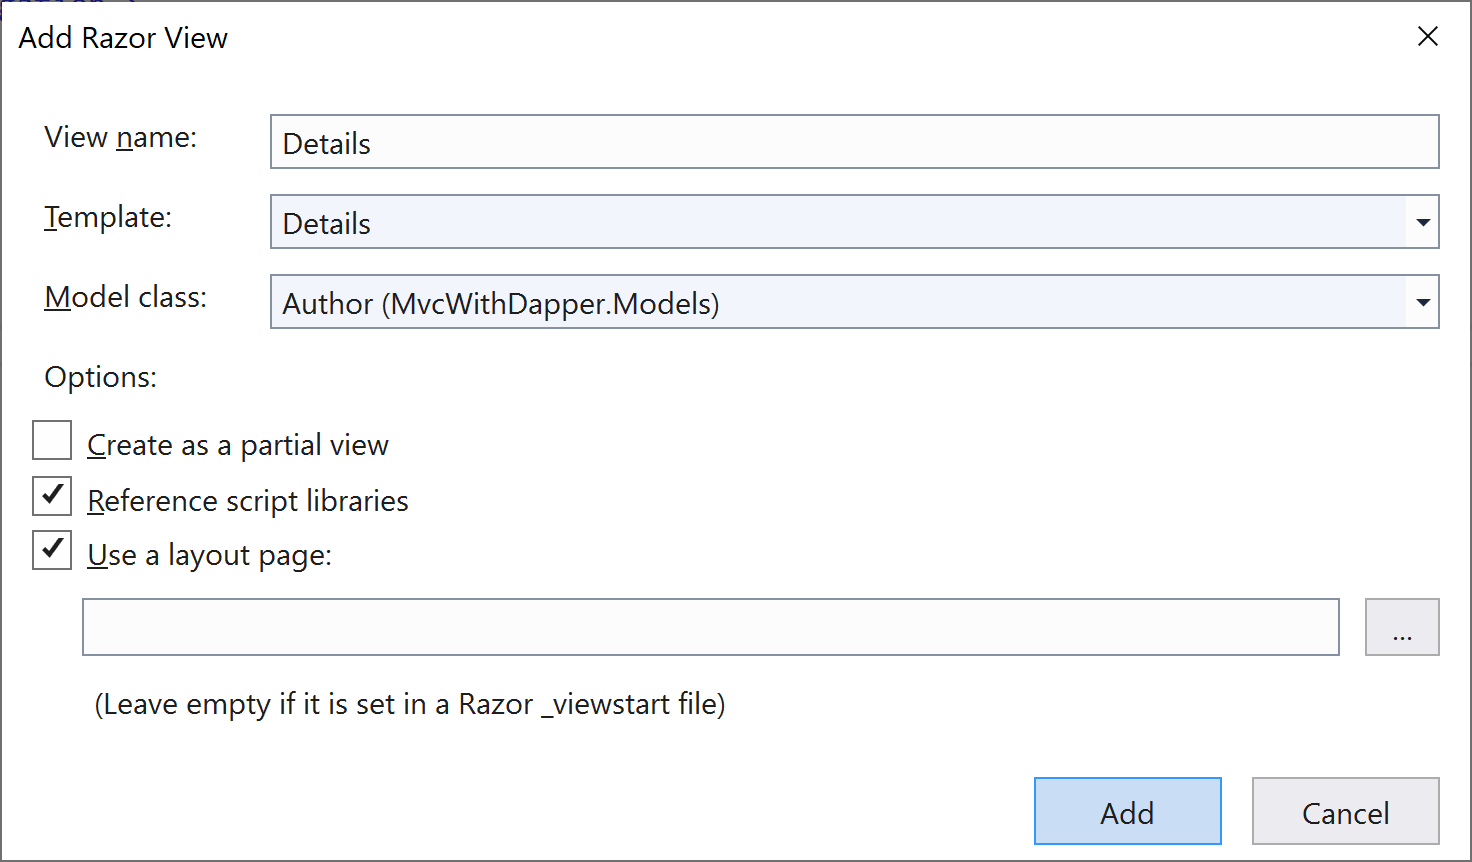
First, we will add a Details view by right-clicking on Author folder and select Add > Views... option. It will open the Add New Scaffolded Item dialog, select the Razor View and enter the following details.
You will see the following code is added automatically for you in the Details.cshtml file.
@model MvcWithDapper.Models.Author

@{
    ViewData["Title"] = "Details";
}

<h1>Details</h1>

<div>
    <h4>Author</h4>
    <hr />
    <dl class="row">
        <dt class = "col-sm-2">
            @Html.DisplayNameFor(model => model.AuthorId)
        </dt>
        <dd class = "col-sm-10">
            @Html.DisplayFor(model => model.AuthorId)
        </dd>
        <dt class = "col-sm-2">
            @Html.DisplayNameFor(model => model.FirstName)
        </dt>
        <dd class = "col-sm-10">
            @Html.DisplayFor(model => model.FirstName)
        </dd>
        <dt class = "col-sm-2">
            @Html.DisplayNameFor(model => model.LastName)
        </dt>
        <dd class = "col-sm-10">
            @Html.DisplayFor(model => model.LastName)
        </dd>
        <dt class = "col-sm-2">
            @Html.DisplayNameFor(model => model.Address)
        </dt>
        <dd class = "col-sm-10">
            @Html.DisplayFor(model => model.Address)
        </dd>
        <dt class = "col-sm-2">
            @Html.DisplayNameFor(model => model.City)
        </dt>
        <dd class = "col-sm-10">
            @Html.DisplayFor(model => model.City)
        </dd>
        <dt class = "col-sm-2">
            @Html.DisplayNameFor(model => model.PostalCode)
        </dt>
        <dd class = "col-sm-10">
            @Html.DisplayFor(model => model.PostalCode)
        </dd>
        <dt class = "col-sm-2">
            @Html.DisplayNameFor(model => model.Country)
        </dt>
        <dd class = "col-sm-10">
            @Html.DisplayFor(model => model.Country)
        </dd>
    </dl>
</div>
<div>
    @Html.ActionLink("Edit", "Edit", new { /* id = Model.PrimaryKey */ }) |
    <a asp-action="Index">Back to List</a>
</div>
Each field is displayed using a DisplayFor helper, so here it will display the contents of the author in an HTML table.
Now let's update the Details action method of AuthorController to fetch the particular author from the database, as shown below.
// GET: AuthorController/Details/5
public ActionResult Details(int id)
{
    string sqlAuthor = "SELECT * FROM Authors WHERE AuthorId = " + id + ";";

    using (var connection = new SqlConnection("Data Source=(localdb)\\ProjectsV13;Initial Catalog=AuthorDb;Trusted_Connection=True;MultipleActiveResultSets=true"))
    {
        var author = connection.Query<Author>(sqlAuthor).FirstOrDefault();
        return View(author);
    }
}
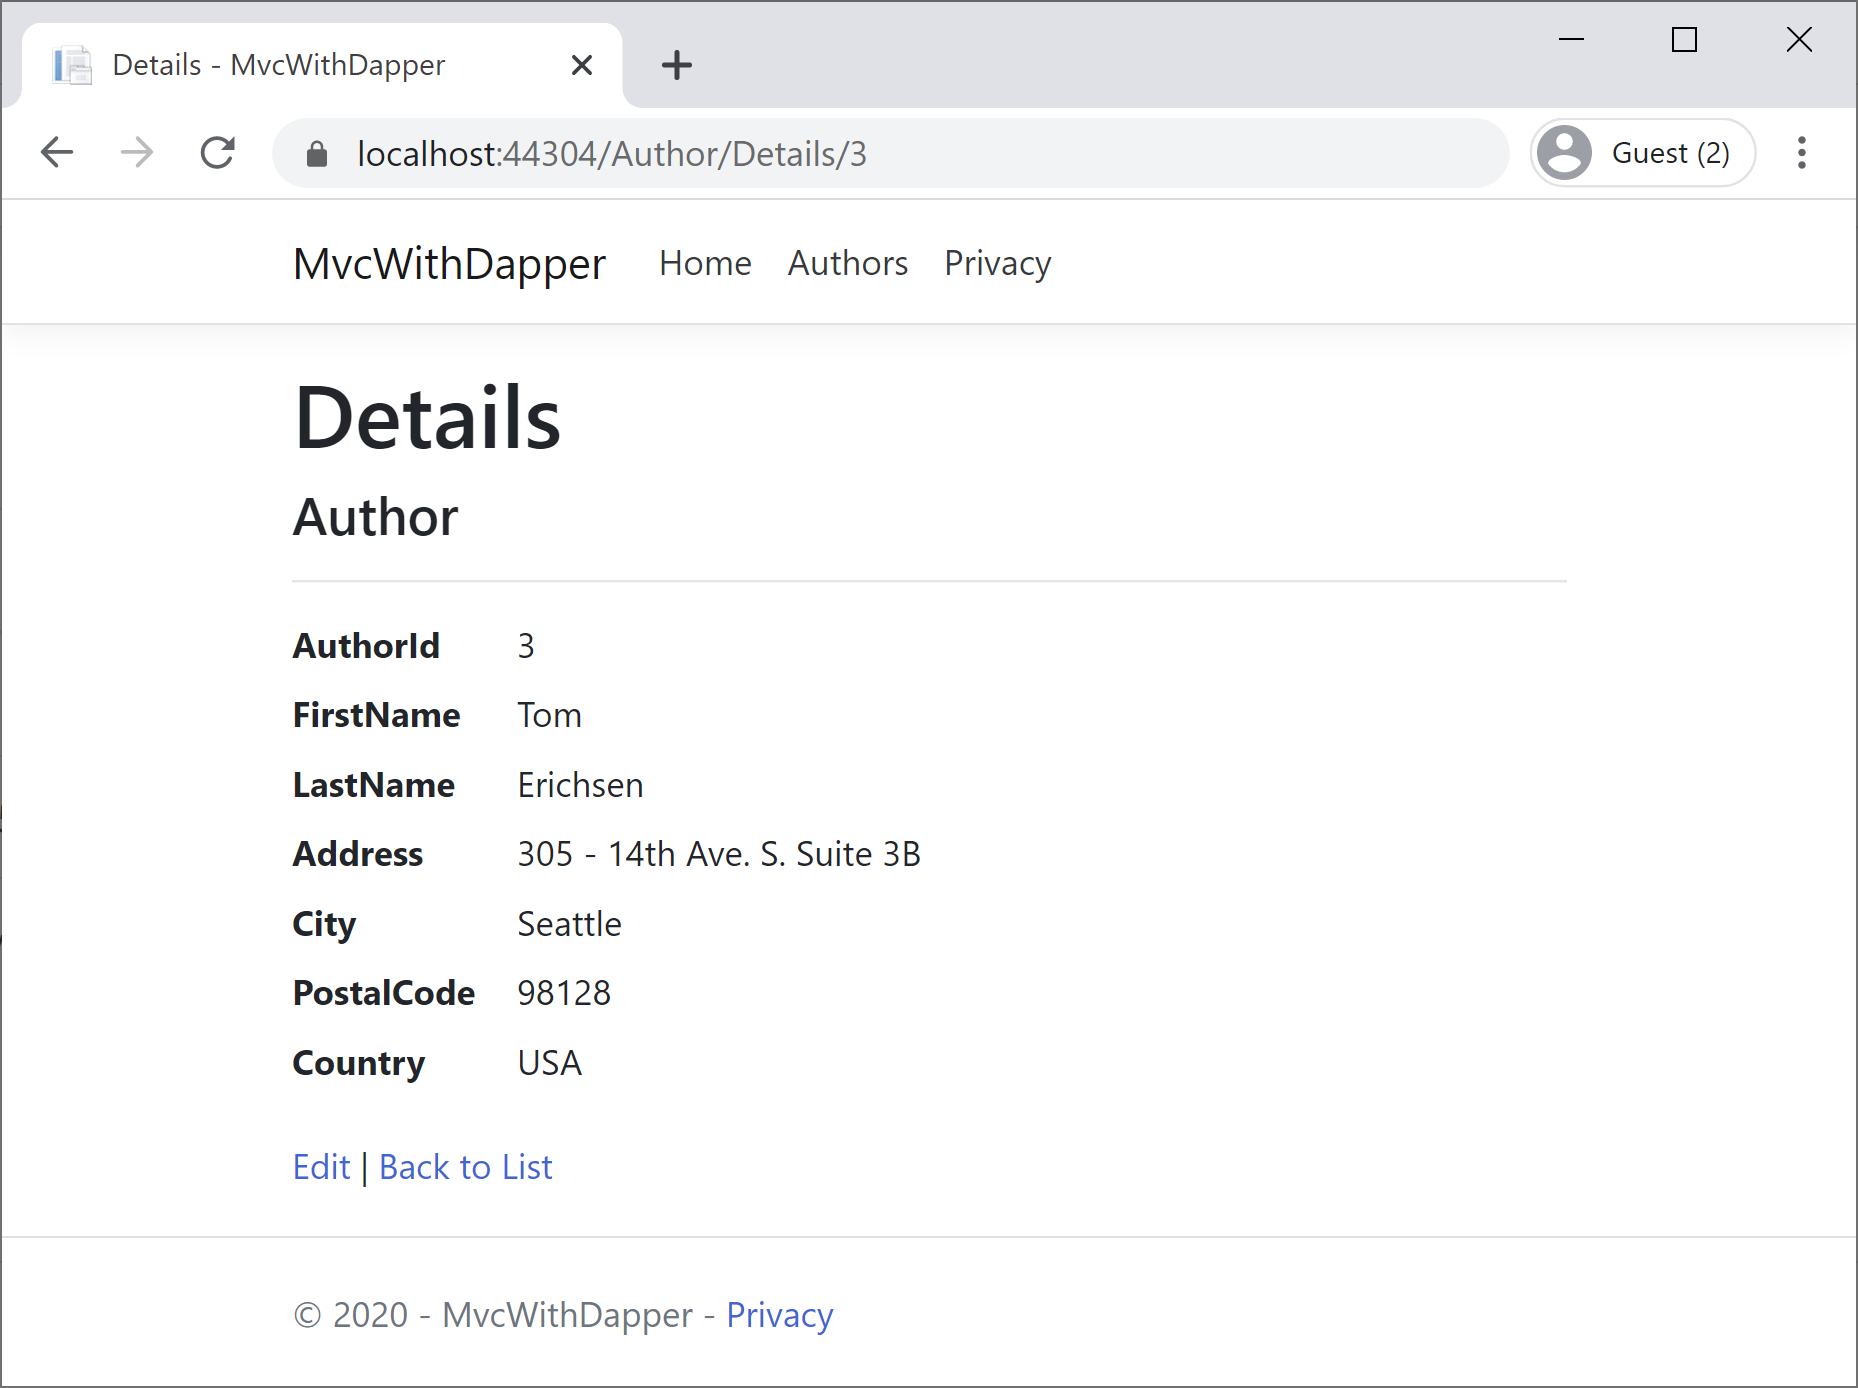
Now run your application and go to the details page.
Create View
First, we will add a Create view by right-clicking on the Author folder and select the Add > Views... option. It will open the Add New Scaffolded Item dialog, select the Razor View and enter the following details.
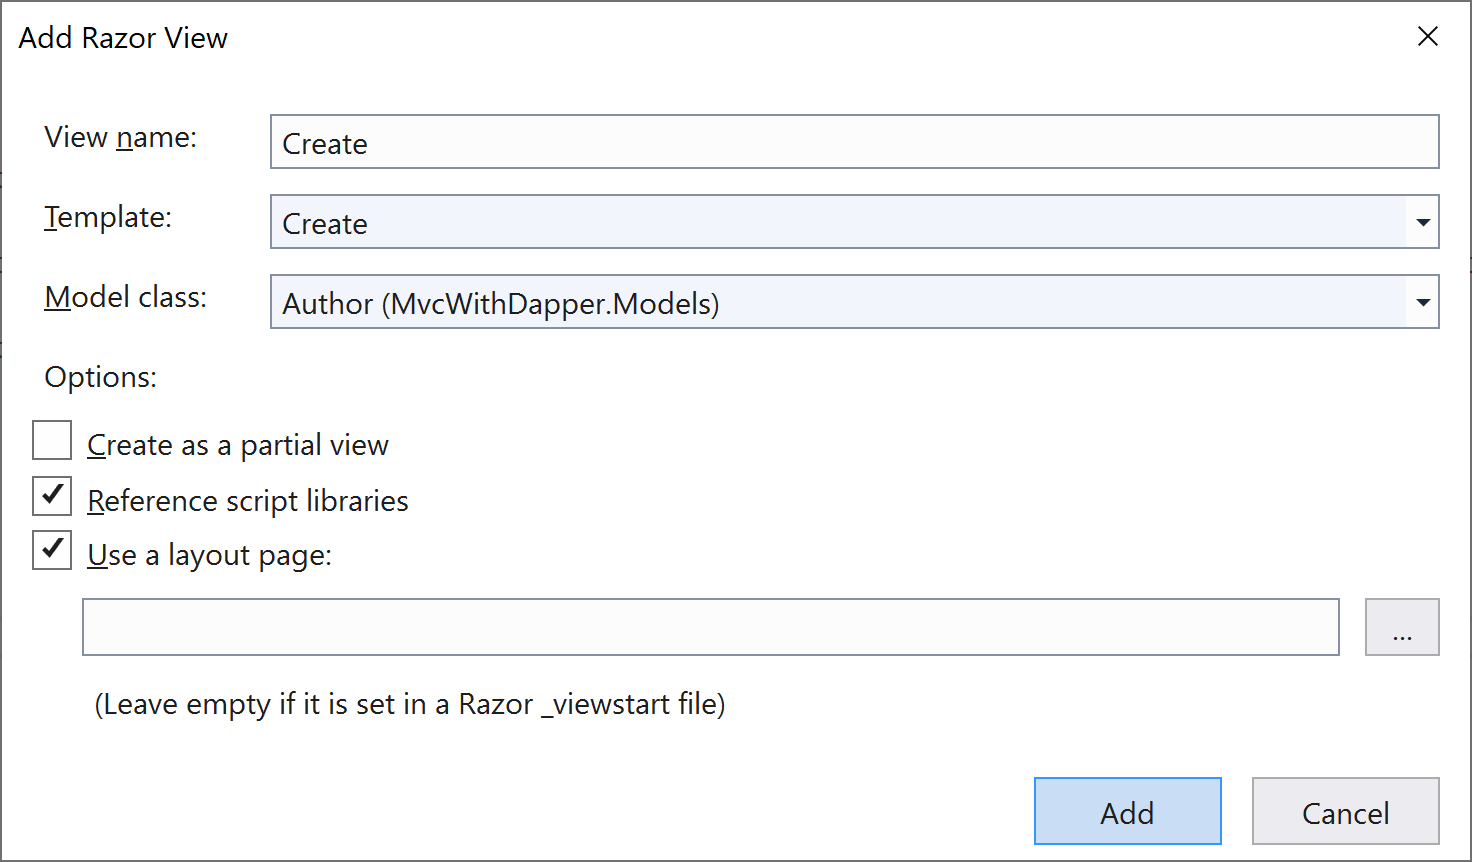
You will see the following code is added automatically for you in the Details.cshtml file.
@model MvcWithDapper.Models.Author

@{
    ViewData["Title"] = "Create";
}

<h1>Create</h1>

<h4>Author</h4>
<hr />
<div class="row">
    <div class="col-md-4">
        <form asp-action="Create">
            <div asp-validation-summary="ModelOnly" class="text-danger"></div>
            <div class="form-group">
                <label asp-for="AuthorId" class="control-label"></label>
                <input asp-for="AuthorId" class="form-control" />
                <span asp-validation-for="AuthorId" class="text-danger"></span>
            </div>
            <div class="form-group">
                <label asp-for="FirstName" class="control-label"></label>
                <input asp-for="FirstName" class="form-control" />
                <span asp-validation-for="FirstName" class="text-danger"></span>
            </div>
            <div class="form-group">
                <label asp-for="LastName" class="control-label"></label>
                <input asp-for="LastName" class="form-control" />
                <span asp-validation-for="LastName" class="text-danger"></span>
            </div>
            <div class="form-group">
                <label asp-for="Address" class="control-label"></label>
                <input asp-for="Address" class="form-control" />
                <span asp-validation-for="Address" class="text-danger"></span>
            </div>
            <div class="form-group">
                <label asp-for="City" class="control-label"></label>
                <input asp-for="City" class="form-control" />
                <span asp-validation-for="City" class="text-danger"></span>
            </div>
            <div class="form-group">
                <label asp-for="PostalCode" class="control-label"></label>
                <input asp-for="PostalCode" class="form-control" />
                <span asp-validation-for="PostalCode" class="text-danger"></span>
            </div>
            <div class="form-group">
                <label asp-for="Country" class="control-label"></label>
                <input asp-for="Country" class="form-control" />
                <span asp-validation-for="Country" class="text-danger"></span>
            </div>
            <div class="form-group">
                <input type="submit" value="Create" class="btn btn-primary" />
            </div>
        </form>
    </div>
</div>

<div>
    <a asp-action="Index">Back to List</a>
</div>

@section Scripts {
    @{await Html.RenderPartialAsync("_ValidationScriptsPartial");}
}
It uses labels, input, and span (for validation messages), tag helpers, for each field. This is server-side validation that you get by default.
In the above code, you will see the field for AuthorId which we do not want, because we have an identity column in the database, so let's remove the following div tag from the Create.cshtml file.
<div class="form-group">
    <label asp-for="AuthorId" class="control-label"></label>
    <input asp-for="AuthorId" class="form-control" />
    <span asp-validation-for="AuthorId" class="text-danger"></span>
</div>
Now let's update the Create HttpPost action method of AuthorController to fetch the particular author from the database as shown below.
// POST: AuthorController/Create
[HttpPost]
[ValidateAntiForgeryToken]
public ActionResult Create([Bind("FirstName,LastName,Address, City, PostalCode, Country")] Author author)
{
    string sql = "INSERT INTO Authors (FirstName, LastName, Address, City, PostalCode, Country) VALUES (@FirstName, @LastName, @Address, @City, @PostalCode, @Country);";
    try
    {
        if (ModelState.IsValid)
        {
            using (var connection = new SqlConnection("Data Source=(localdb)\\ProjectsV13;Initial Catalog=AuthorDb;Trusted_Connection=True;MultipleActiveResultSets=true"))
            {
                var affectedRows = connection.Execute(sql,
                    new
                    {
                        FirstName = author.FirstName,
                        LastName = author.LastName,
                        Address = author.Address,
                        City = author.City,
                        PostalCode = author.PostalCode,
                        Country = author.Country
                    });

                return RedirectToAction("Index");
            }

        }
    }
    catch (Exception /* ex */)
    {
        //Log the error (uncomment ex variable name and write a log.
        ModelState.AddModelError("", "Unable to save changes. " +
            "Try again, and if the problem persists " +
            "see your system administrator.");
    }

    return View(author);
}
Now run your application and go to the create page.
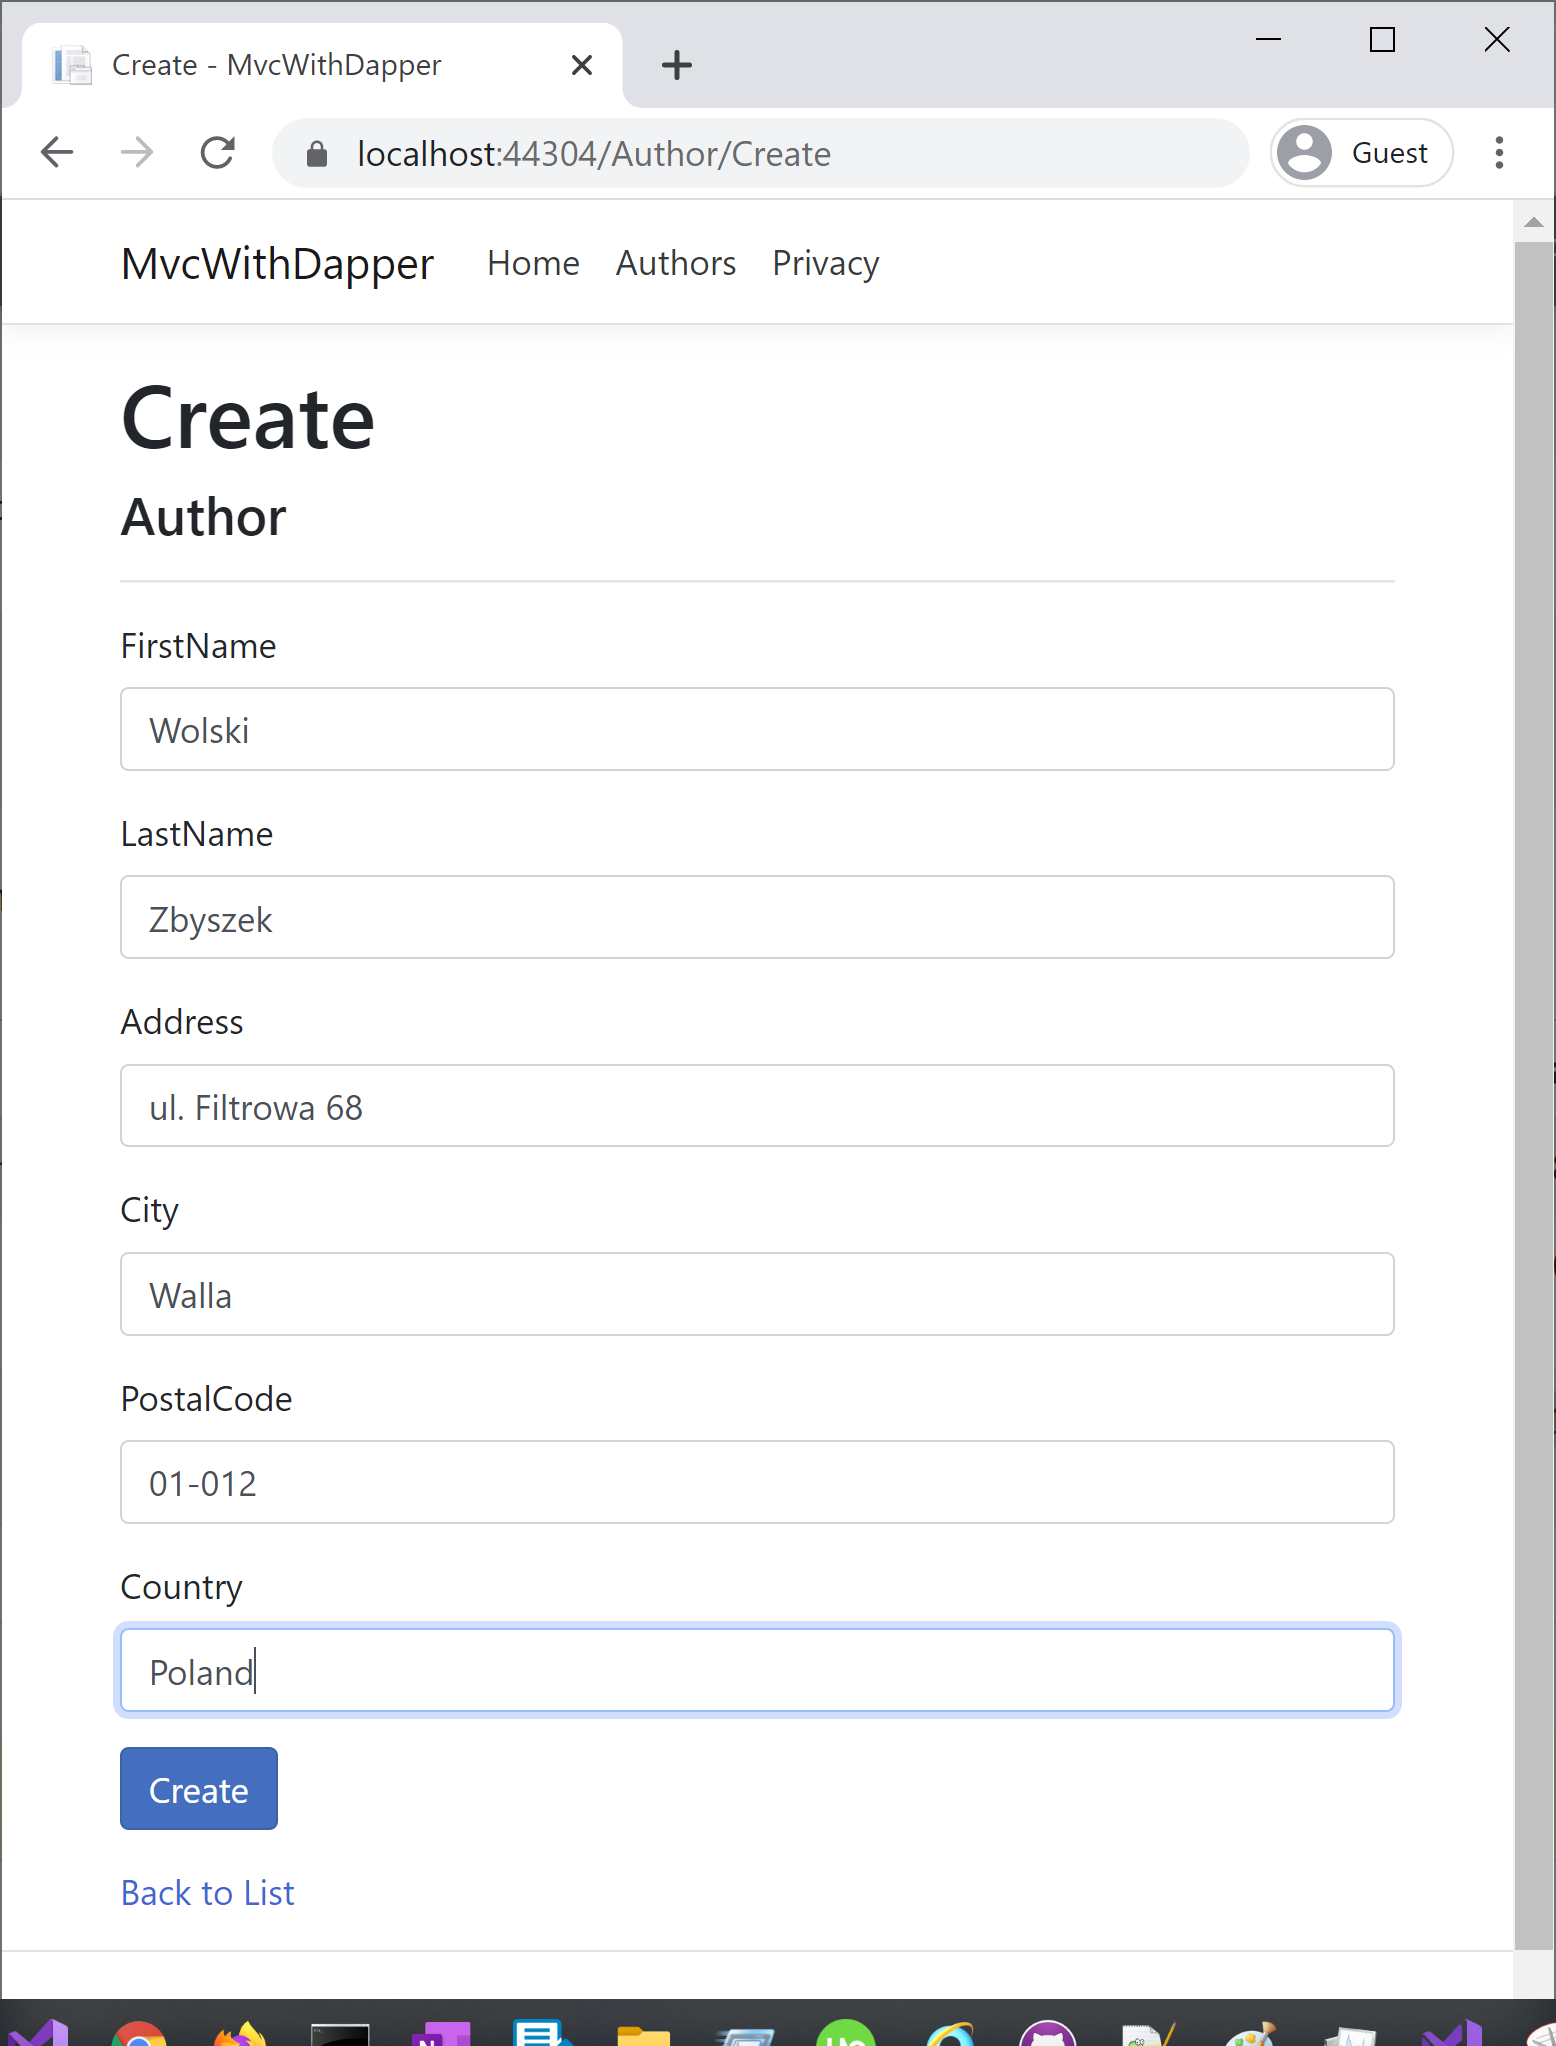
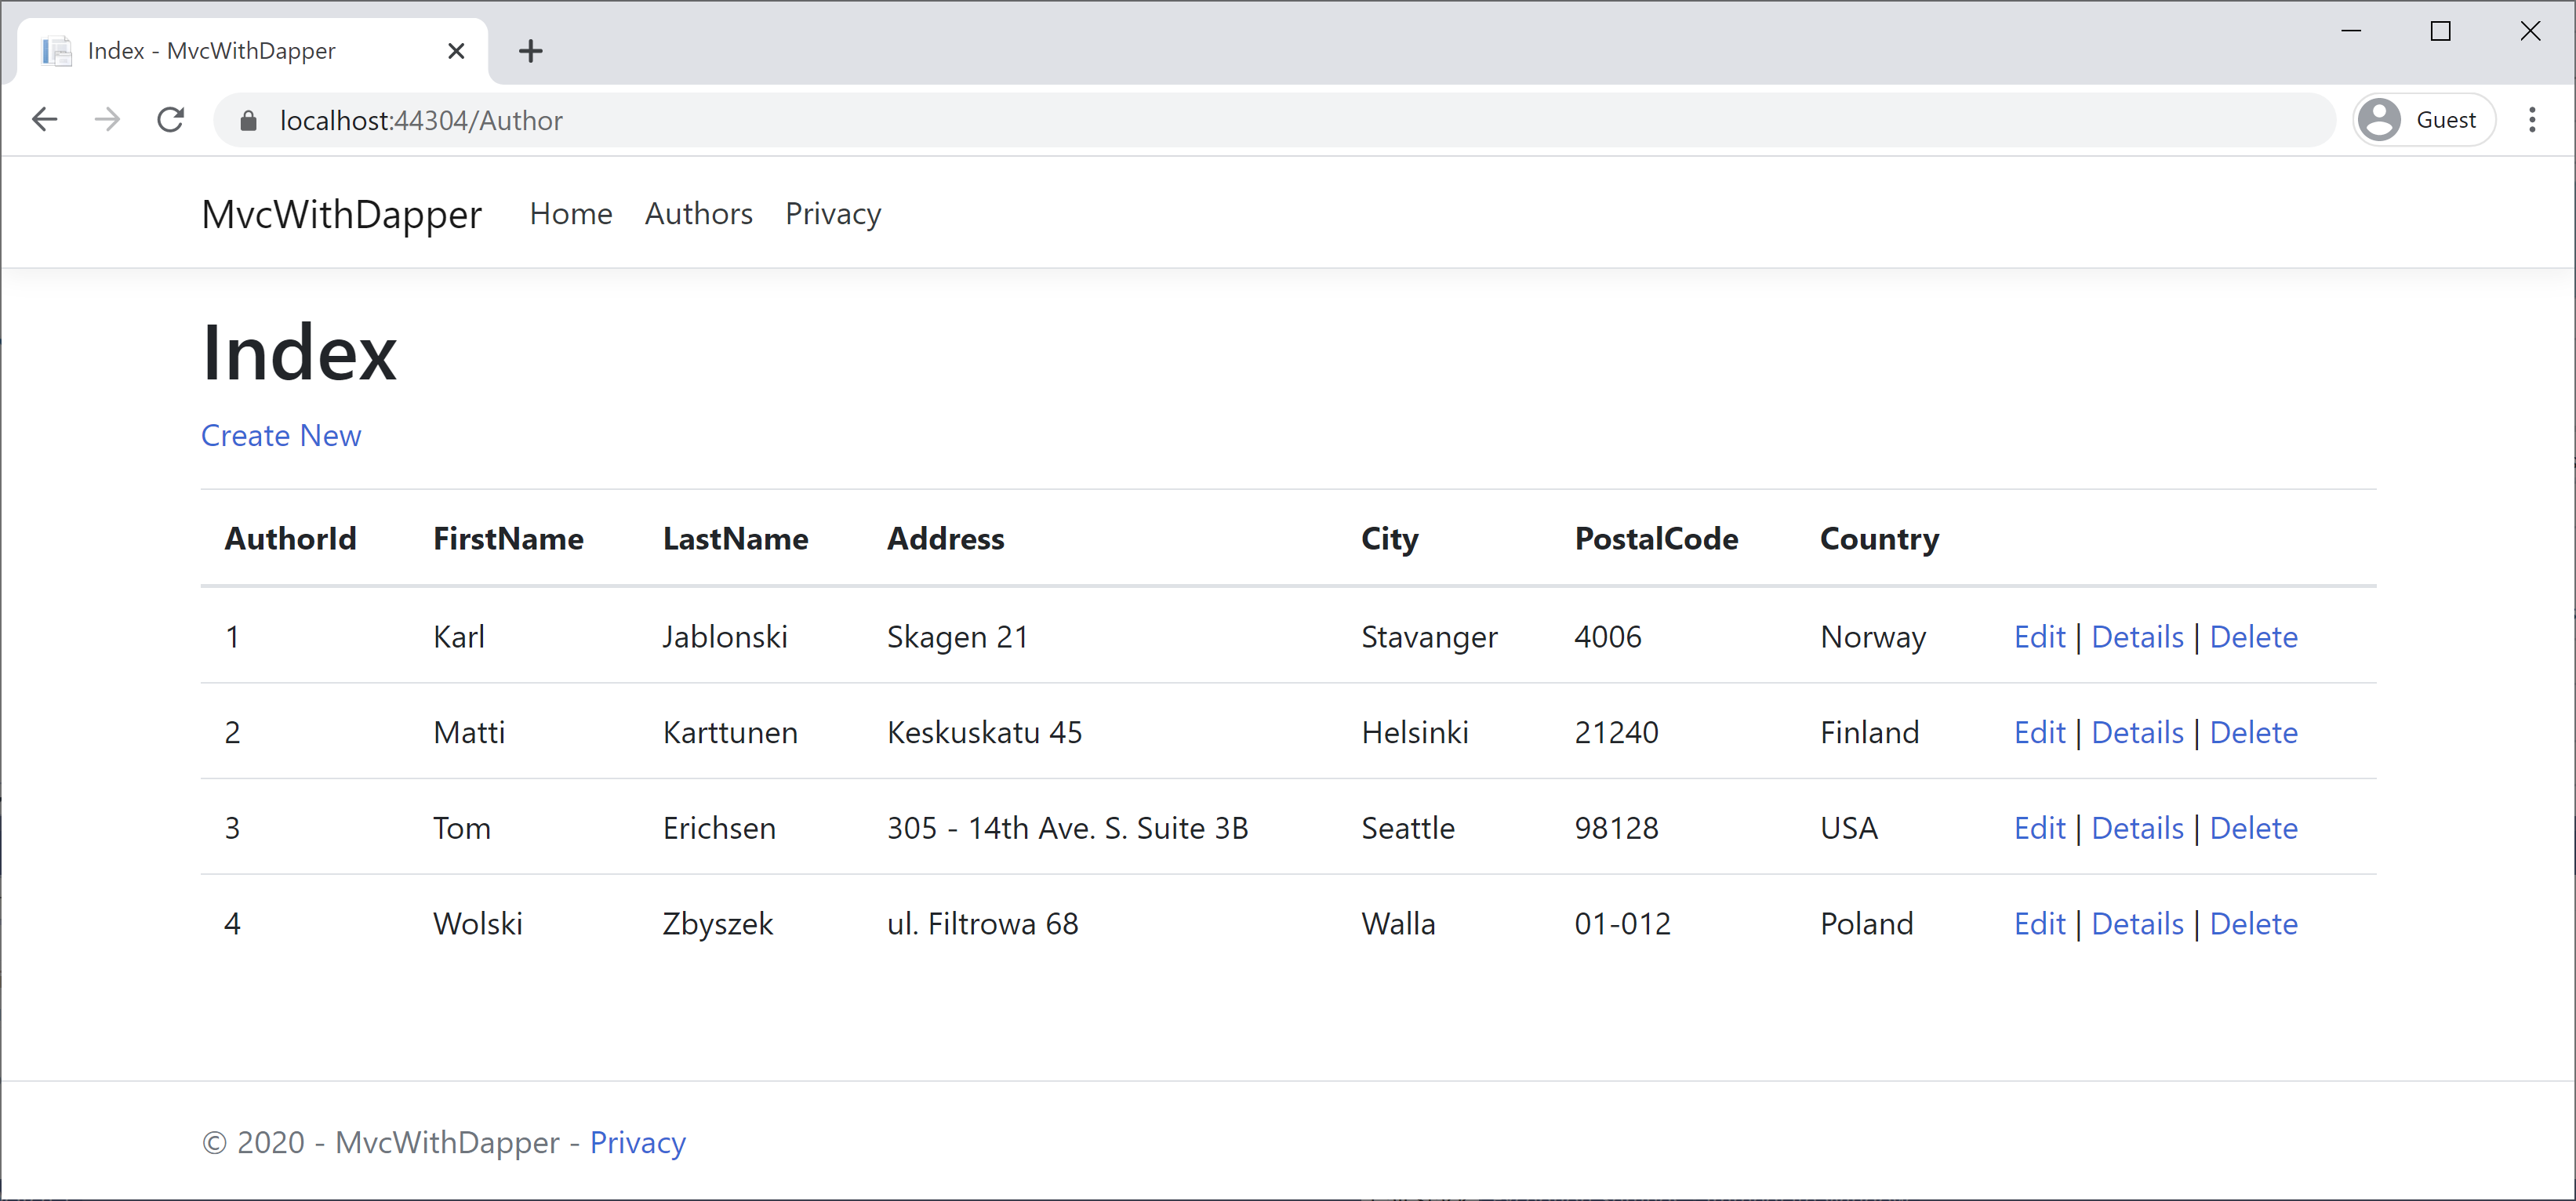
Enter the information of an author you want to add and click on the Create button, and you will see a new author is added to the list.
Edit View
First, we will add an Edit view by right-clicking on Author folder and select Add > Views... option. It will open the Add New Scaffolded Item dialog, select the Razor View and enter the following details.
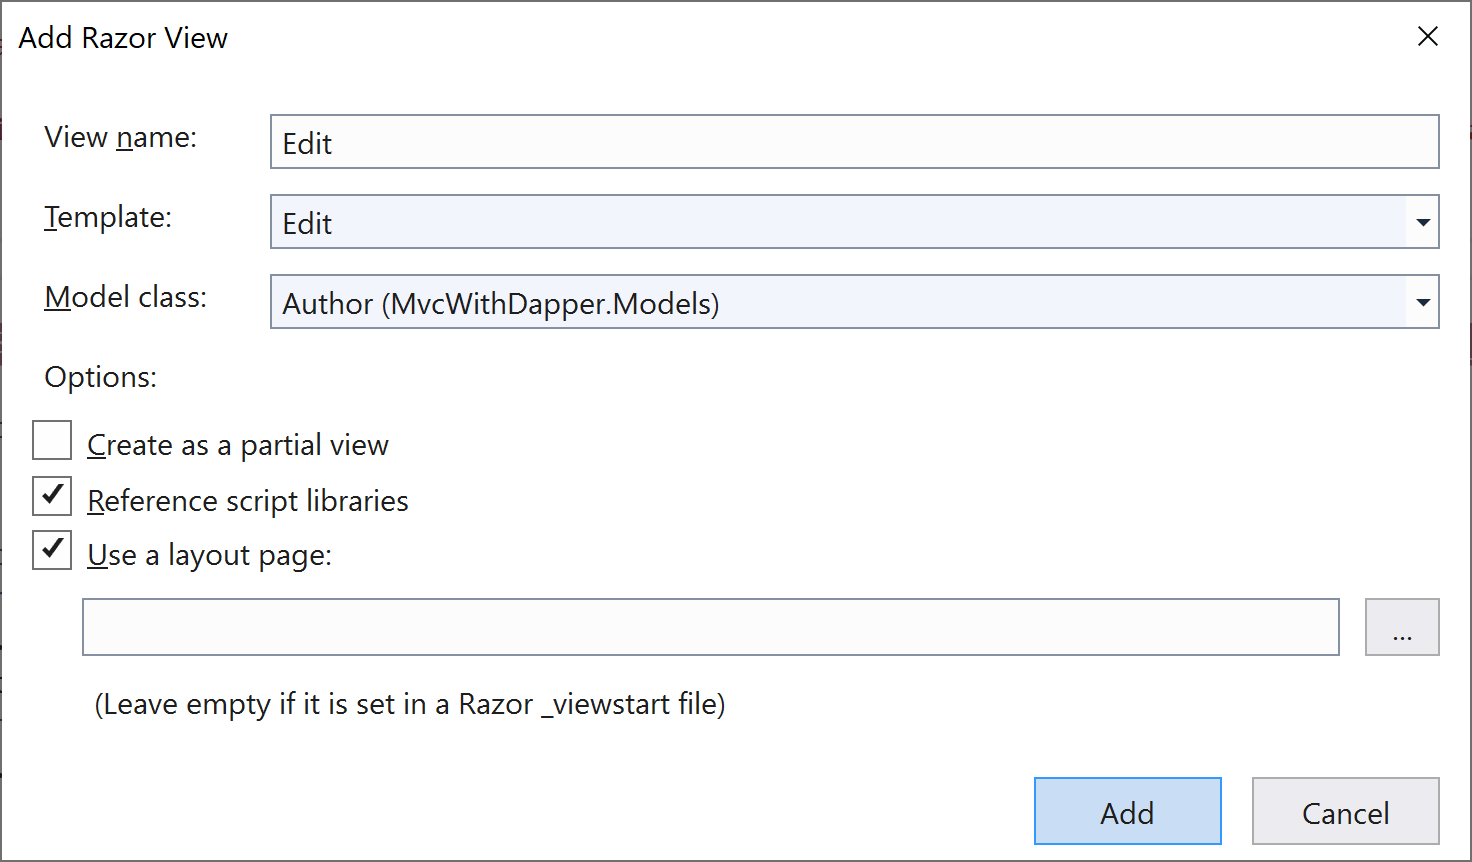
You will see the following code is added automatically for you in the Edit.cshtml file.
@model MvcWithDapper.Models.Author

@{
    ViewData["Title"] = "Edit";
}

<h1>Edit</h1>

<h4>Author</h4>
<hr />
<div class="row">
    <div class="col-md-4">
        <form asp-action="Edit">
            <div asp-validation-summary="ModelOnly" class="text-danger"></div>
            <div class="form-group">
                <label asp-for="AuthorId" class="control-label"></label>
                <input asp-for="AuthorId" class="form-control" />
                <span asp-validation-for="AuthorId" class="text-danger"></span>
            </div>
            <div class="form-group">
                <label asp-for="FirstName" class="control-label"></label>
                <input asp-for="FirstName" class="form-control" />
                <span asp-validation-for="FirstName" class="text-danger"></span>
            </div>
            <div class="form-group">
                <label asp-for="LastName" class="control-label"></label>
                <input asp-for="LastName" class="form-control" />
                <span asp-validation-for="LastName" class="text-danger"></span>
            </div>
            <div class="form-group">
                <label asp-for="Address" class="control-label"></label>
                <input asp-for="Address" class="form-control" />
                <span asp-validation-for="Address" class="text-danger"></span>
            </div>
            <div class="form-group">
                <label asp-for="City" class="control-label"></label>
                <input asp-for="City" class="form-control" />
                <span asp-validation-for="City" class="text-danger"></span>
            </div>
            <div class="form-group">
                <label asp-for="PostalCode" class="control-label"></label>
                <input asp-for="PostalCode" class="form-control" />
                <span asp-validation-for="PostalCode" class="text-danger"></span>
            </div>
            <div class="form-group">
                <label asp-for="Country" class="control-label"></label>
                <input asp-for="Country" class="form-control" />
                <span asp-validation-for="Country" class="text-danger"></span>
            </div>
            <div class="form-group">
                <input type="submit" value="Save" class="btn btn-primary" />
            </div>
        </form>
    </div>
</div>

<div>
    <a asp-action="Index">Back to List</a>
</div>

@section Scripts {
    @{await Html.RenderPartialAsync("_ValidationScriptsPartial");}
}
In the above code, you will see the field for AuthorId which we do not want, because we have an identity column in the database, so let's remove the following div tag from the Create.cshtml file.
<div class="form-group">
    <label asp-for="AuthorId" class="control-label"></label>
    <input asp-for="AuthorId" class="form-control" />
    <span asp-validation-for="AuthorId" class="text-danger"></span>
</div>
Now we need to update both HttpGet and HttpPost Edit actions. In HttpGet Edit action we will retrieve the specified author data and display it in the edit view.
// GET: AuthorController/Edit/5
public ActionResult Edit(int id)
{
    string sqlAuthor = "SELECT * FROM Authors WHERE AuthorId = " + id + ";";

    using (var connection = new SqlConnection("Data Source=(localdb)\\ProjectsV13;Initial Catalog=AuthorDb;Trusted_Connection=True;MultipleActiveResultSets=true"))
    {
        var author = connection.Query<Author>(sqlAuthor).FirstOrDefault();
        return View(author);
    }
}
To update the author data, we will also need to update the HttpPost Edit action, as shown below.
// POST: AuthorController/Edit/5
[HttpPost]
[ValidateAntiForgeryToken]
public ActionResult Edit(int id, [Bind("FirstName,LastName,Address, City, PostalCode, Country")] Author author)
{
    string sql = @"UPDATE Authors
                    SET FirstName = @FirstName,
                        LastName = @LastName,
                        Address = @Address,
                        City = @City,
                        PostalCode = @PostalCode,
                        Country = @Country
                    WHERE AuthorId = " + id + ";";
    try
    {
        if (ModelState.IsValid)
        {
            using (var connection = new SqlConnection("Data Source=(localdb)\\ProjectsV13;Initial Catalog=AuthorDb;Trusted_Connection=True;MultipleActiveResultSets=true"))
            {
                var affectedRows = connection.Execute(sql,
                    new
                    {
                        FirstName = author.FirstName,
                        LastName = author.LastName,
                        Address = author.Address,
                        City = author.City,
                        PostalCode = author.PostalCode,
                        Country = author.Country
                    });

                return RedirectToAction("Index");
            }

        }
    }
    catch (Exception /* ex */)
    {
        //Log the error (uncomment ex variable name and write a log.
        ModelState.AddModelError("", "Unable to save changes. " +
            "Try again, and if the problem persists " +
            "see your system administrator.");
    }

    return View(author);
}
Now run your application and go to the edit page.
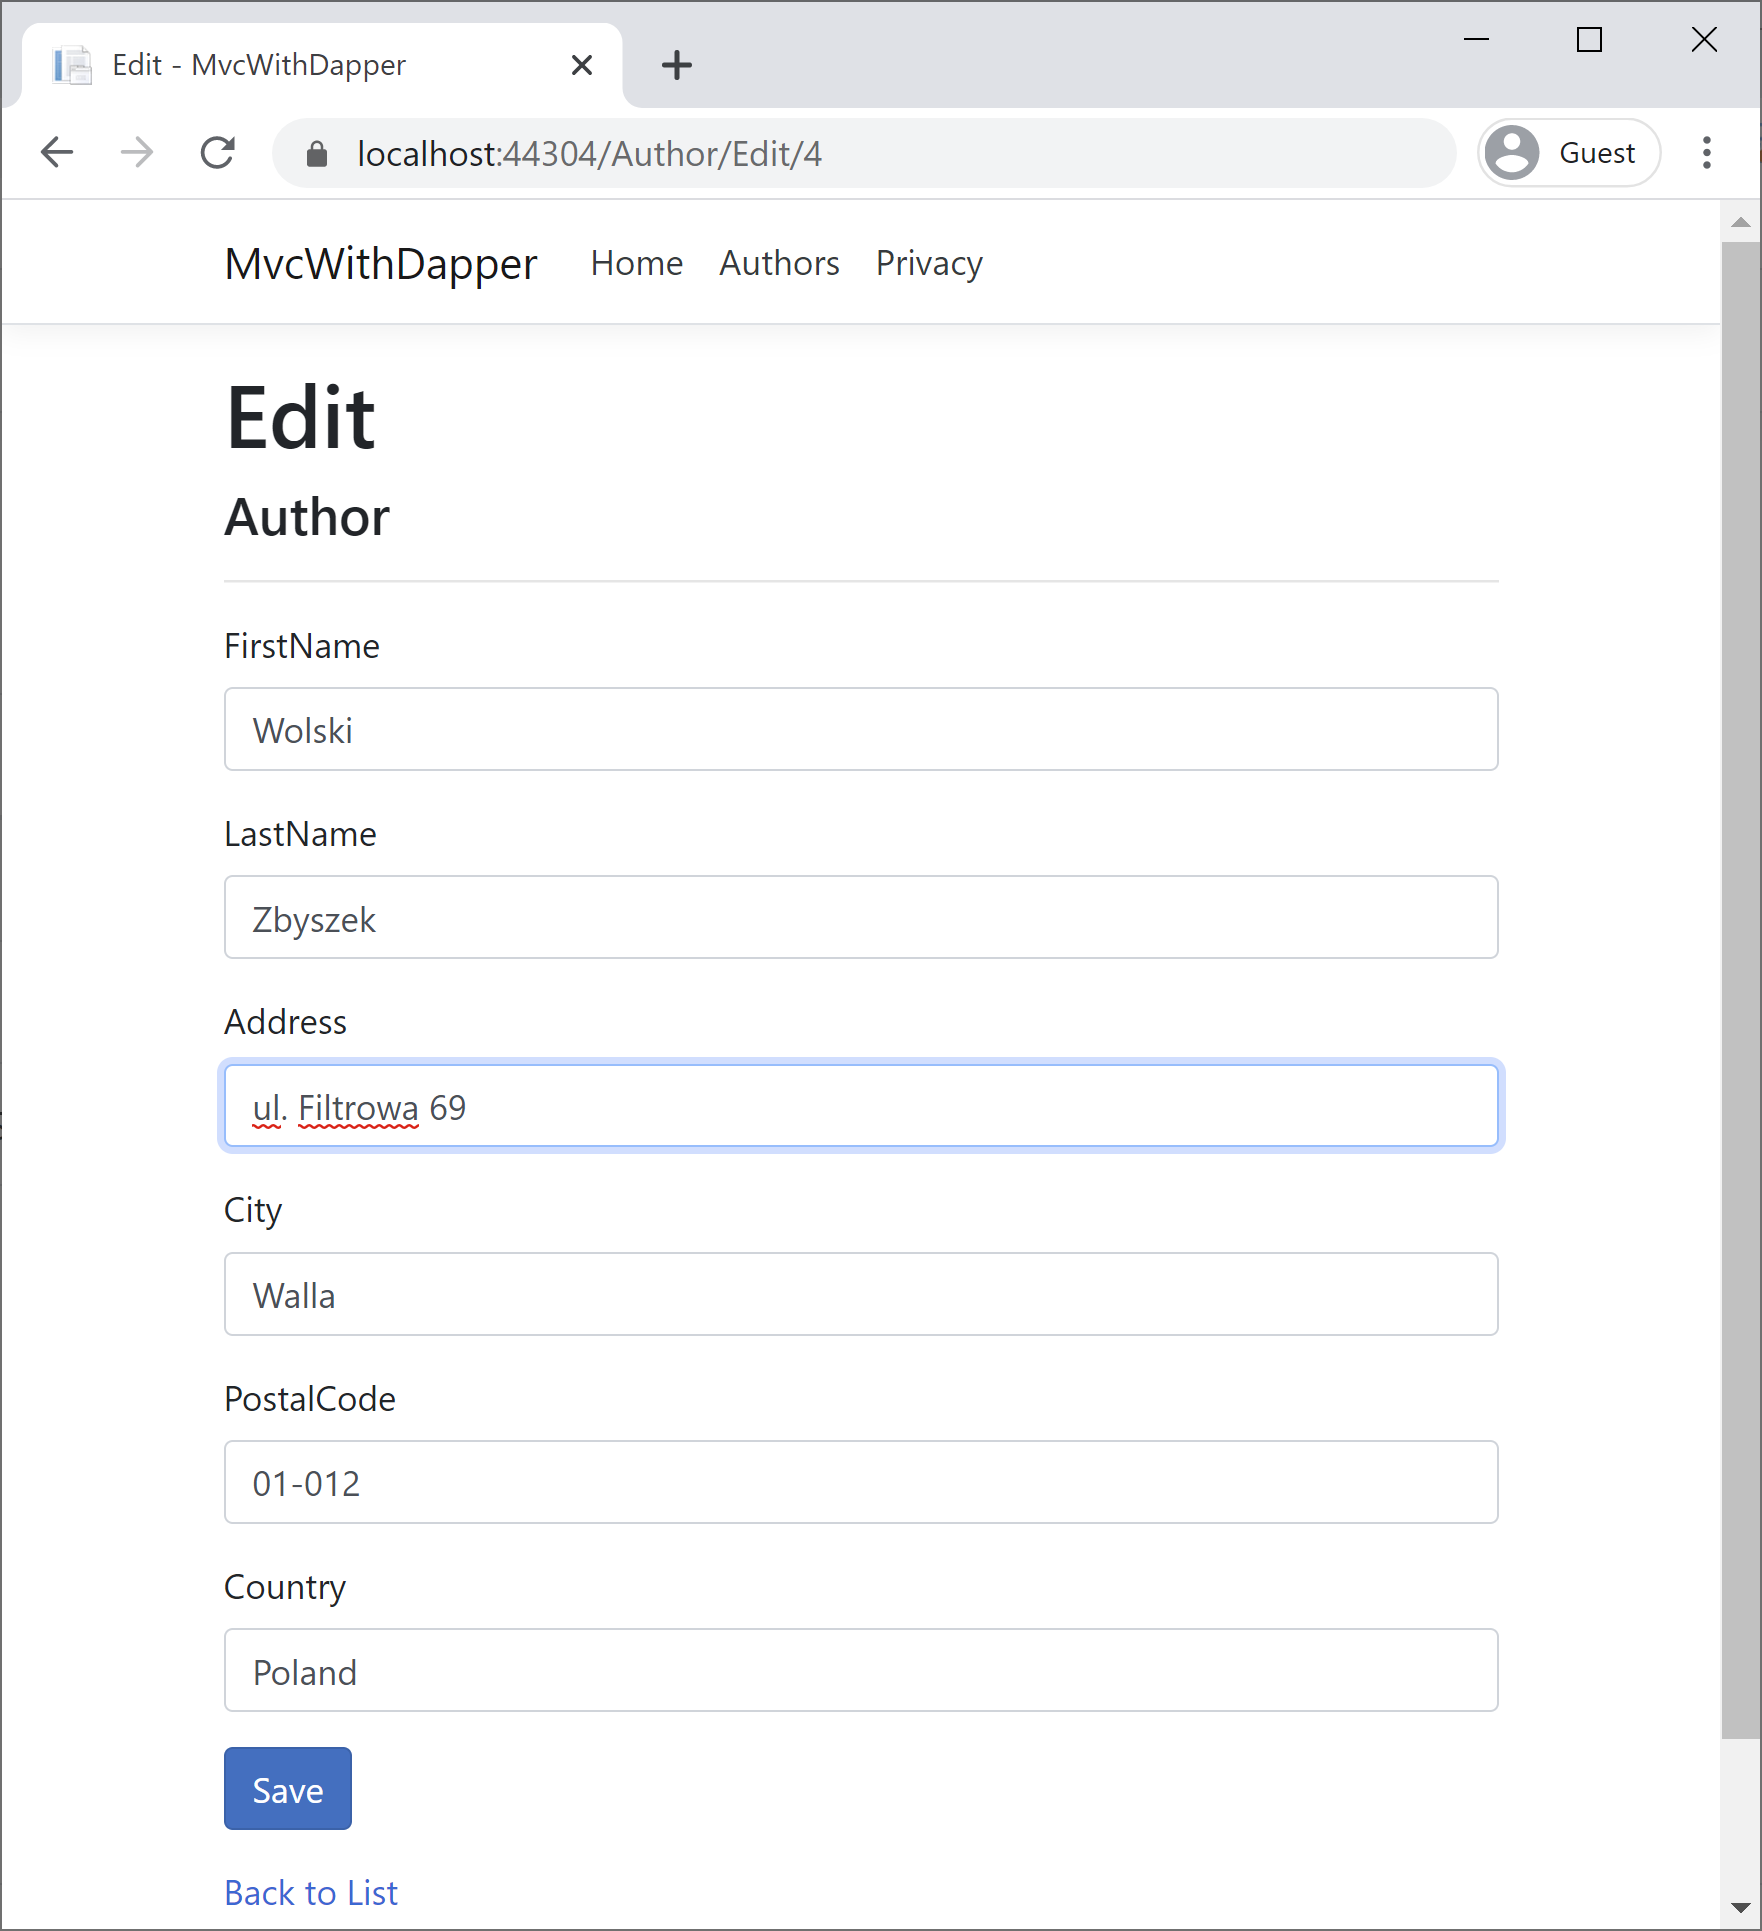
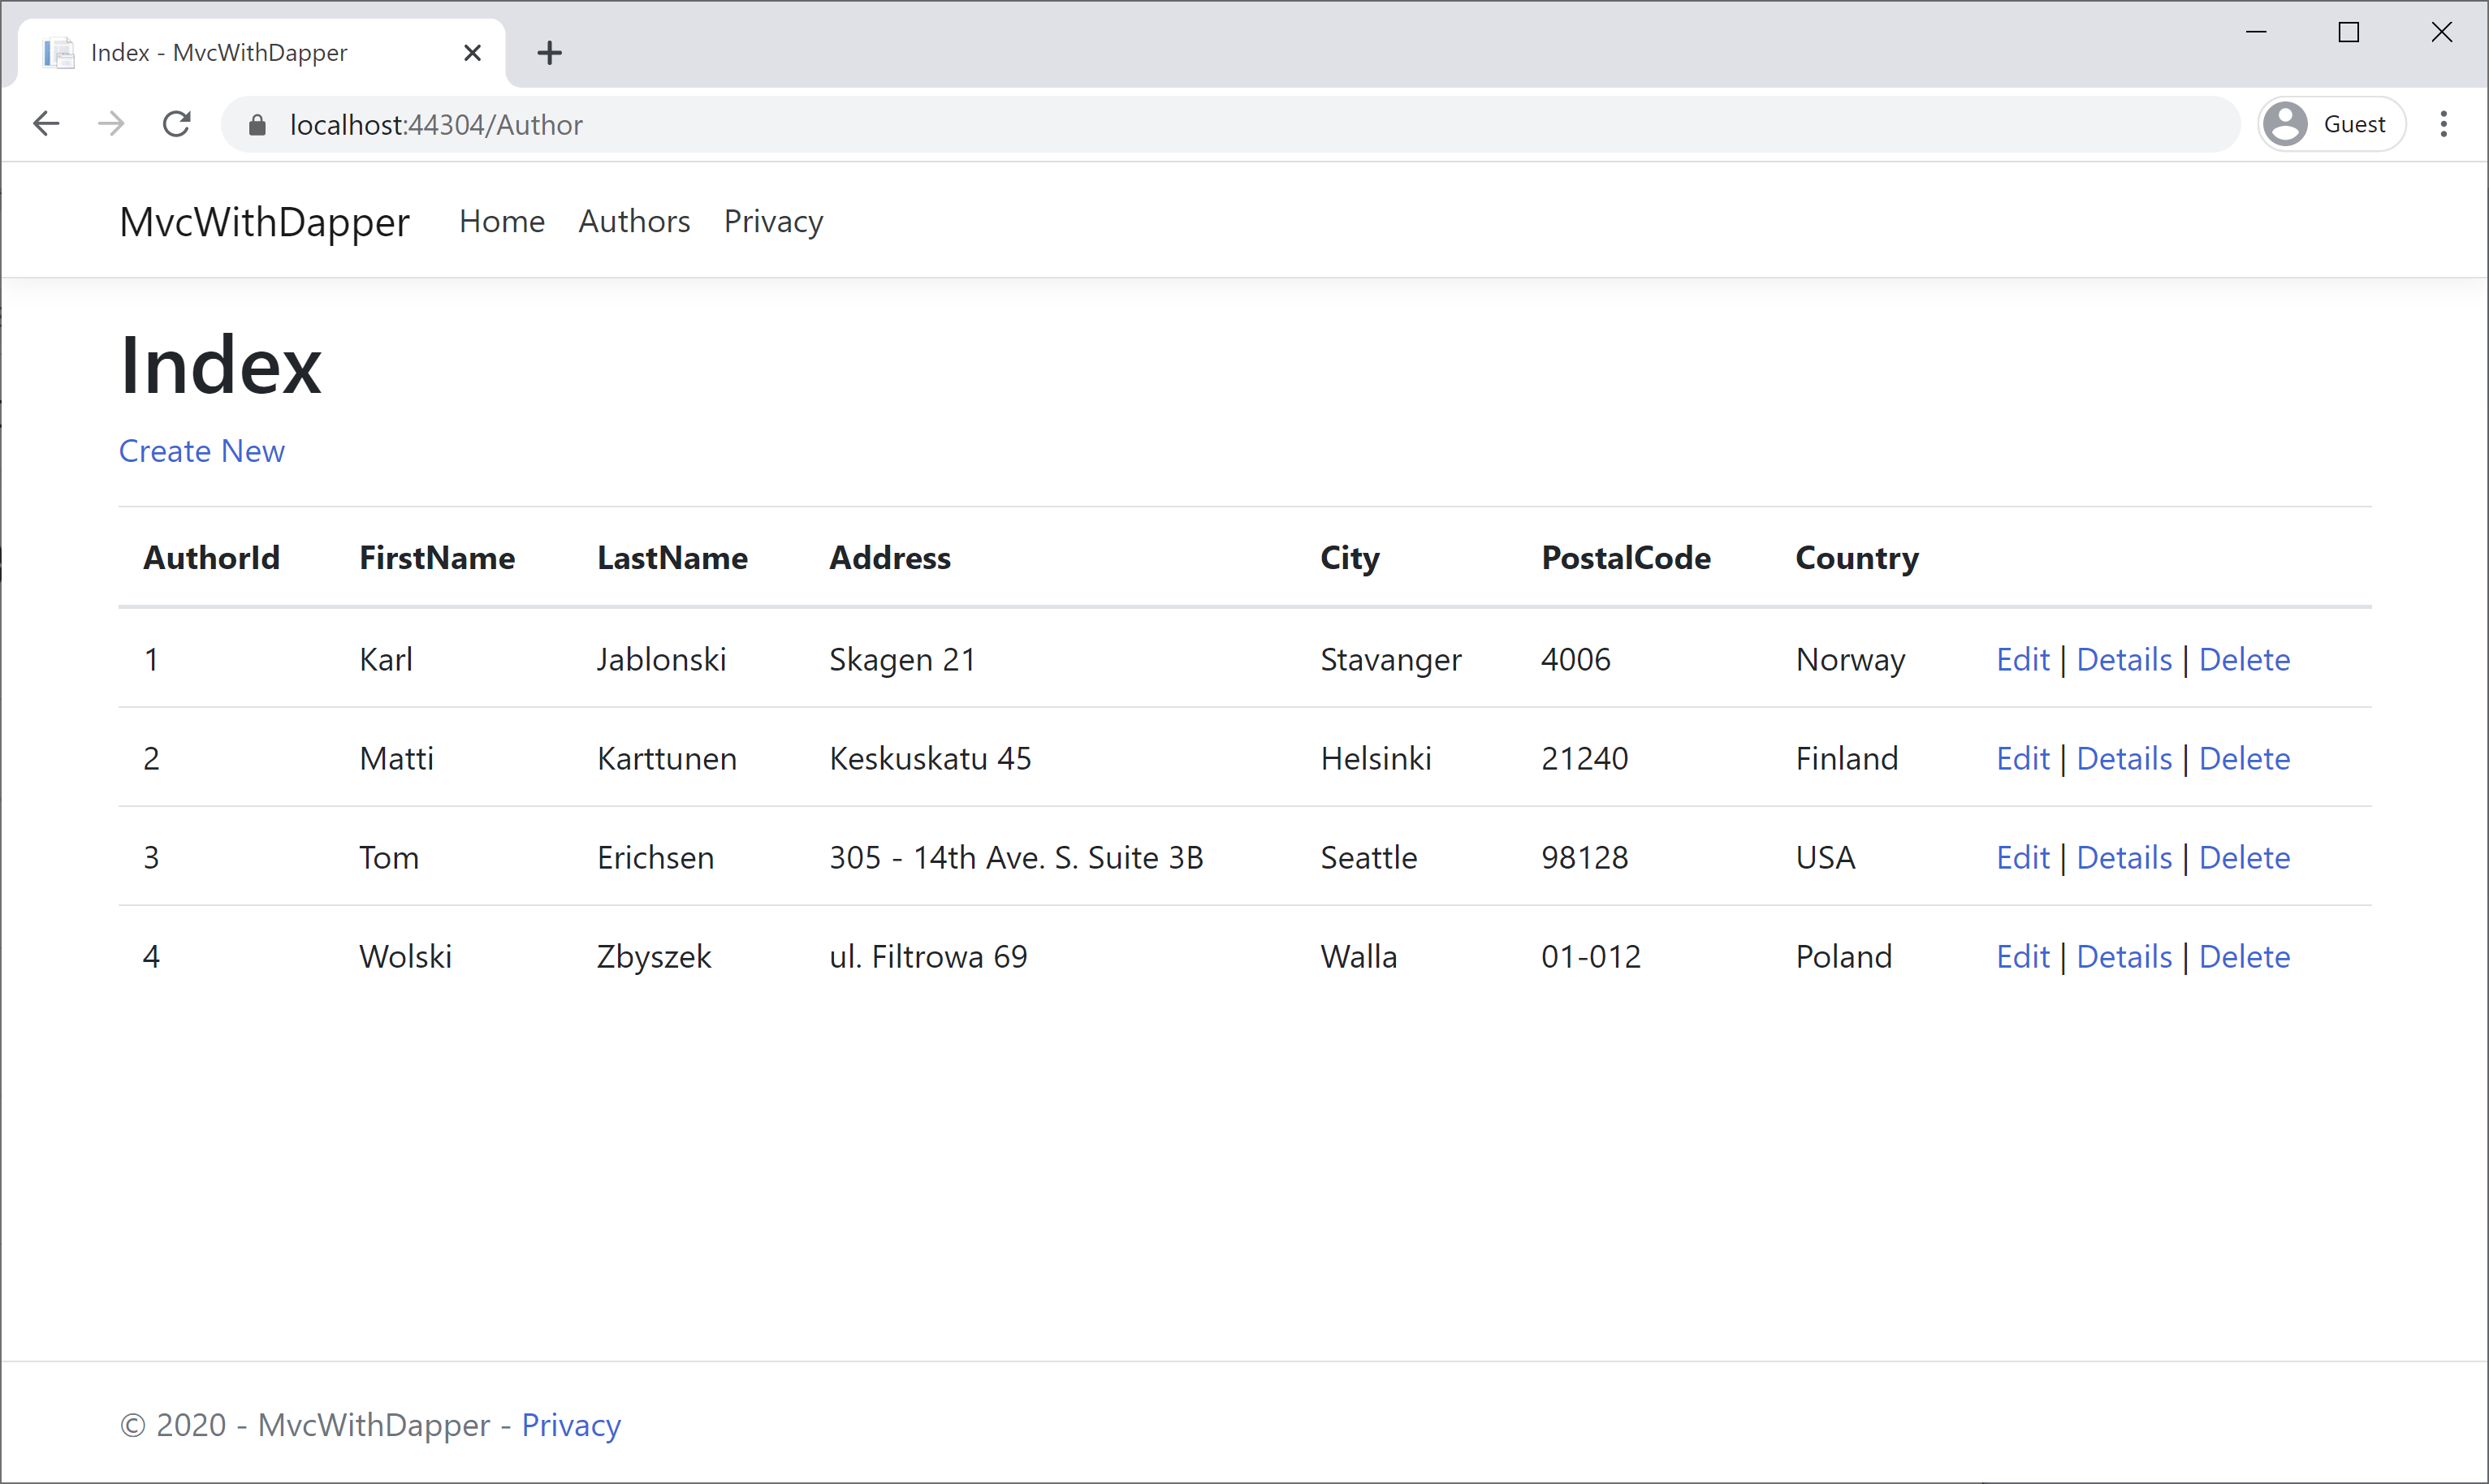
To update an author's information, here we will update the Address field and click on the Save button, and you will see the specified author information is updated.
Delete View
First, we will add a Delete view by right-clicking on Author folder and select Add > Views... option. It will open the Add New Scaffolded Item dialog, select the Razor View and enter the following details.
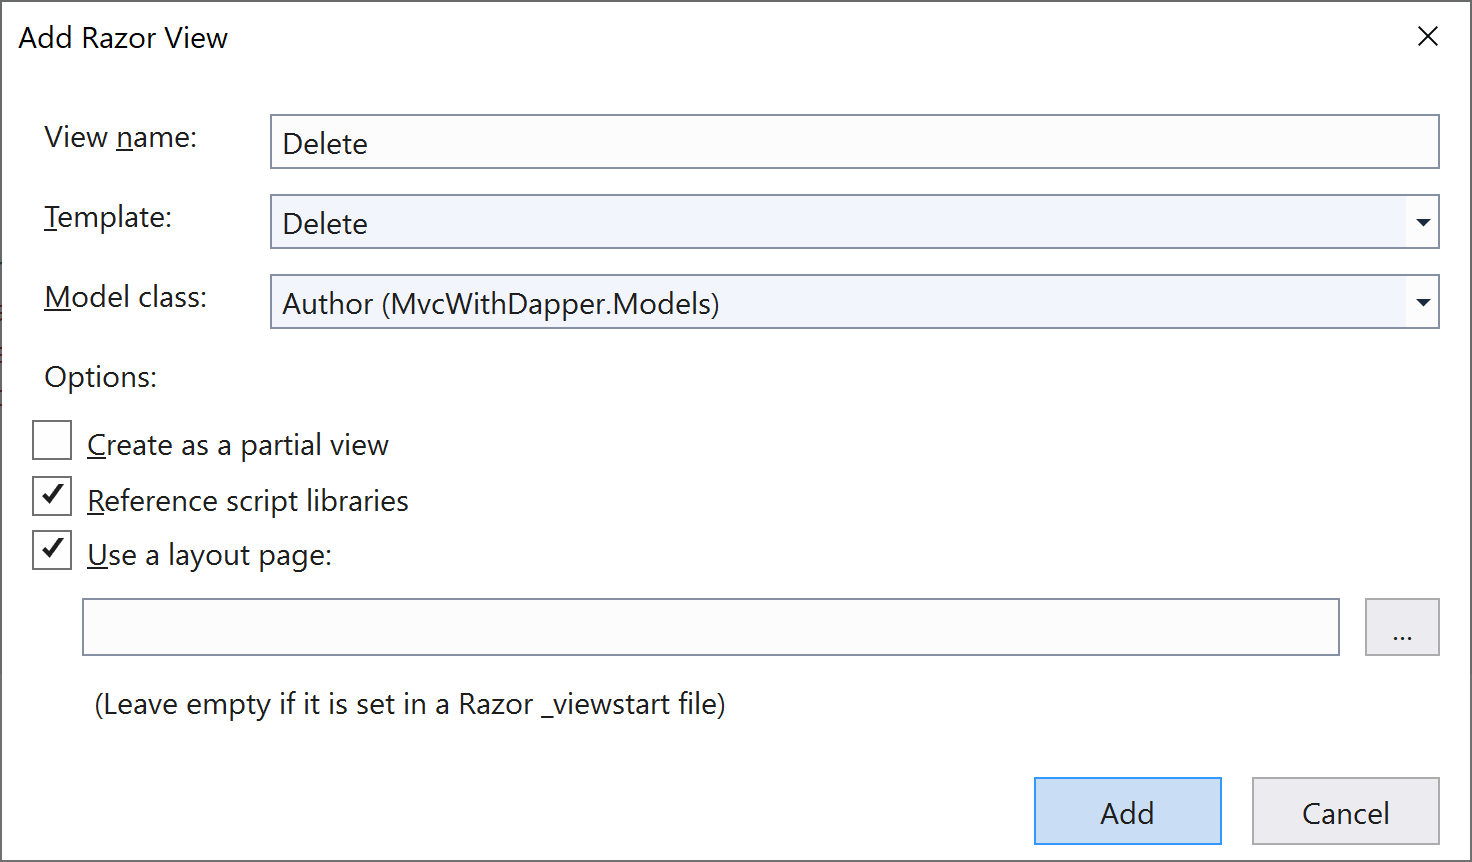
You will see the following code is added automatically for you in the Delete.cshtml file.
@model MvcWithDapper.Models.Author

@{
    ViewData["Title"] = "Delete";
}

<h1>Delete</h1>

<h3>Are you sure you want to delete this?</h3>
<div>
    <h4>Author</h4>
    <hr />
    <dl class="row">
        <dt class = "col-sm-2">
            @Html.DisplayNameFor(model => model.AuthorId)
        </dt>
        <dd class = "col-sm-10">
            @Html.DisplayFor(model => model.AuthorId)
        </dd>
        <dt class = "col-sm-2">
            @Html.DisplayNameFor(model => model.FirstName)
        </dt>
        <dd class = "col-sm-10">
            @Html.DisplayFor(model => model.FirstName)
        </dd>
        <dt class = "col-sm-2">
            @Html.DisplayNameFor(model => model.LastName)
        </dt>
        <dd class = "col-sm-10">
            @Html.DisplayFor(model => model.LastName)
        </dd>
        <dt class = "col-sm-2">
            @Html.DisplayNameFor(model => model.Address)
        </dt>
        <dd class = "col-sm-10">
            @Html.DisplayFor(model => model.Address)
        </dd>
        <dt class = "col-sm-2">
            @Html.DisplayNameFor(model => model.City)
        </dt>
        <dd class = "col-sm-10">
            @Html.DisplayFor(model => model.City)
        </dd>
        <dt class = "col-sm-2">
            @Html.DisplayNameFor(model => model.PostalCode)
        </dt>
        <dd class = "col-sm-10">
            @Html.DisplayFor(model => model.PostalCode)
        </dd>
        <dt class = "col-sm-2">
            @Html.DisplayNameFor(model => model.Country)
        </dt>
        <dd class = "col-sm-10">
            @Html.DisplayFor(model => model.Country)
        </dd>
    </dl>

    <form asp-action="Delete">
        <input type="submit" value="Delete" class="btn btn-danger" /> |
        <a asp-action="Index">Back to List</a>
    </form>
</div>
In AuthorController, the method that is called in response to a GET request displays a view that gives the user a chance to approve or cancel the delete operation. In HttpGet Edit action we will retrieve the specified author data and display it in the delete view.
// GET: AuthorController/Delete/5
public ActionResult Delete(int id)
{
    string sqlAuthor = "SELECT * FROM Authors WHERE AuthorId = " + id + ";";

    using (var connection = new SqlConnection("Data Source=(localdb)\\ProjectsV13;Initial Catalog=AuthorDb;Trusted_Connection=True;MultipleActiveResultSets=true"))
    {
        var author = connection.Query<Author>(sqlAuthor).FirstOrDefault();
        return View(author);
    }
}
Replace the HttpPost Delete action method (named DeleteConfirmed) with the following code, which performs the actual delete operation and catches any database update errors.
// POST: AuthorController/Delete/5
[HttpPost, ActionName("Delete")]
[ValidateAntiForgeryToken]
public ActionResult DeleteConfirmed(int id)
{
    string sql = "DELETE FROM Authors WHERE AuthorId = " + id + ";";
    try
    {
        if (ModelState.IsValid)
        {
            using (var connection = new SqlConnection("Data Source=(localdb)\\ProjectsV13;Initial Catalog=AuthorDb;Trusted_Connection=True;MultipleActiveResultSets=true"))
            {
                var affectedRows = connection.Execute(sql);

                return RedirectToAction("Index");
            }

        }
    }
    catch (Exception /* ex */)
    {
        //Log the error (uncomment ex variable name and write a log.
        ModelState.AddModelError("", "Unable to save changes. " +
            "Try again, and if the problem persists " +
            "see your system administrator.");
    }

    return View();
}
Run the app, select the Authors tab, and click a Delete hyperlink.
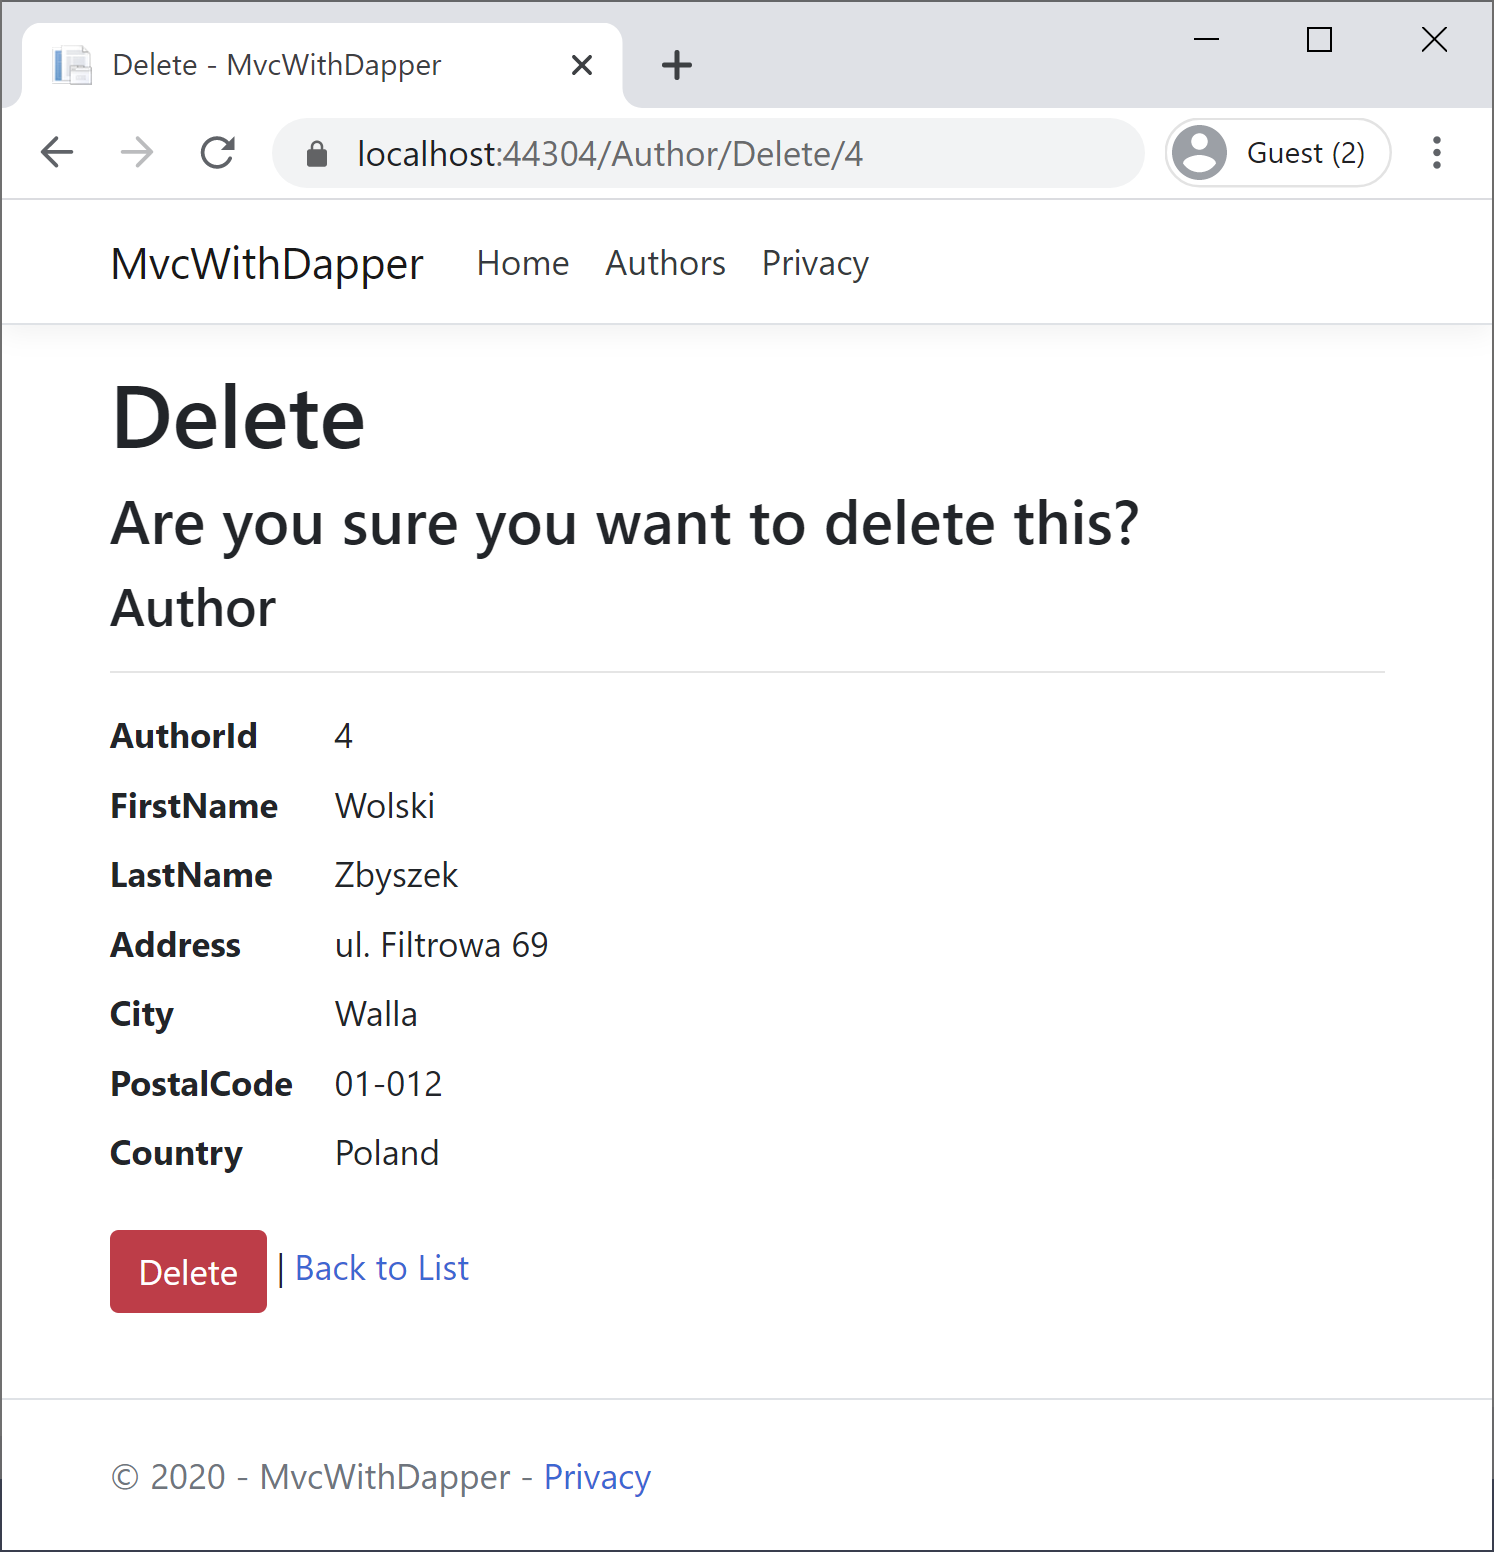
Now click on the Delete button, and you will see that the specified author is deleted from the list.
